Interactions
How to set up Interactions.
Interactions are actions that your Avatar or Level can perform. Interactions can:
- Play animations on your Avatar
- Trigger arbitrary Blueprint script
- Trigger arbitrary Blueprint script
- And more!
If you want to switch your Avatar or Level between multiple states (such as different poses, expressions, or camera positions), consider using Stances instead.
Interactions automatically get a button in the kemorig HUD, and can have hotkeys assigned to them.
Initial Setup - Avatars
Create a DataTable for Interactions
Avatar Interactions are defined in a DataTable with row struct KemorigAvatarSoloInteractionTableData.
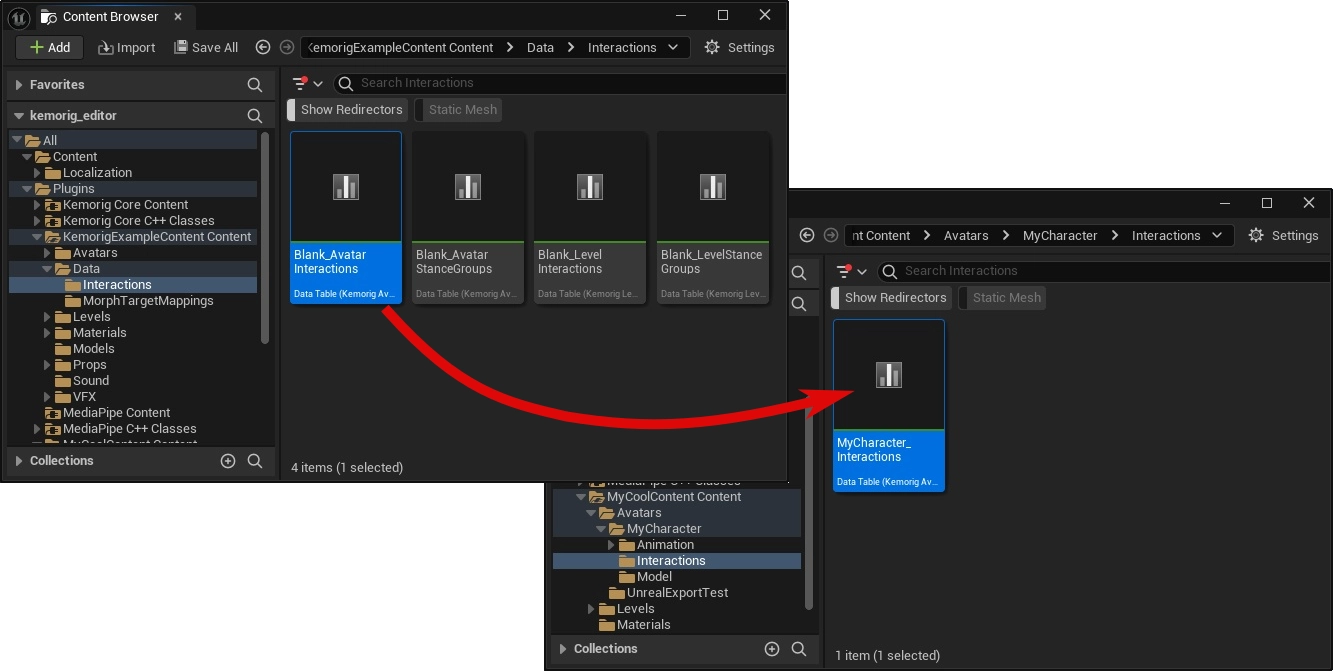
We could create a new one, but let’s copy a blank example included with the project:
- In the content browser, navigate to the folder KemorigExampleContent Content/Data/Interactions/
- Find Blank_AvatarInteractions
- Copy/Paste a copy of this into our avatar folder (I like to use MyCharacter/Interactions/) and rename it
Reference DataTable in Avatar Blueprint
Open your Avatar Blueprint and navigate to the Class Defaults.
In the Interactions category, reference your DataTable in the field Avatar Interactions.
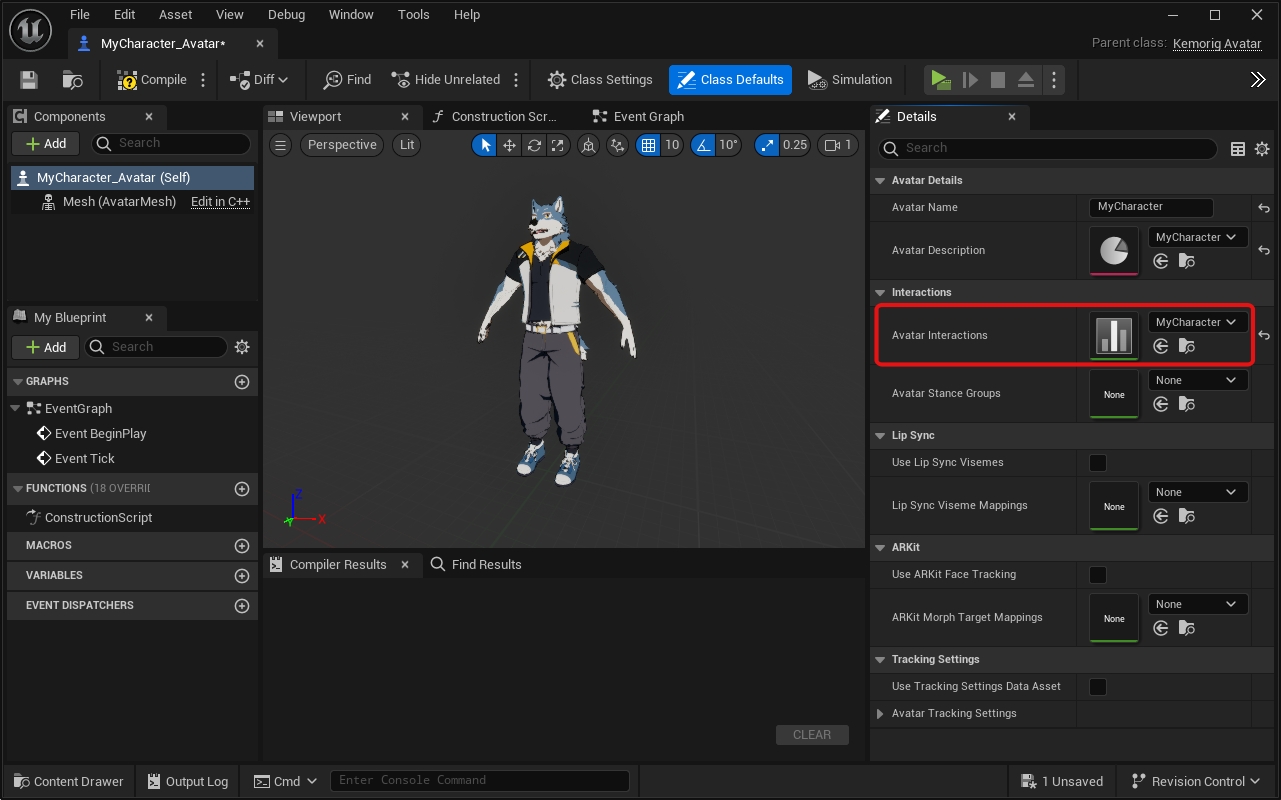
Now, Interactions will work with the Avatar. Any rows we add in the DataTable will create a new Interaction we can use in kemorig.
Initial Setup - Levels
Your Level must have a Level Blueprint in order to implement Interactions.
Create a DataTable for Interactions
Level Interactions are defined in a DataTable with row struct KemorigLevelSoloInteractionTableData.
We could create a new one, but let’s copy a blank example included with the project:
- In the content browser, navigate to the folder KemorigExampleContent Content/Data/Interactions/
- Find Blank_LevelInteractions
- Copy/Paste a copy of this into our level folder (I like to use MyLevel/Interactions/) and rename it

Reference DataTable in Level Blueprint
Open your Level Blueprint and navigate to the Class Defaults.
In the Interactions category, reference your DataTable in the field Level Interactions.
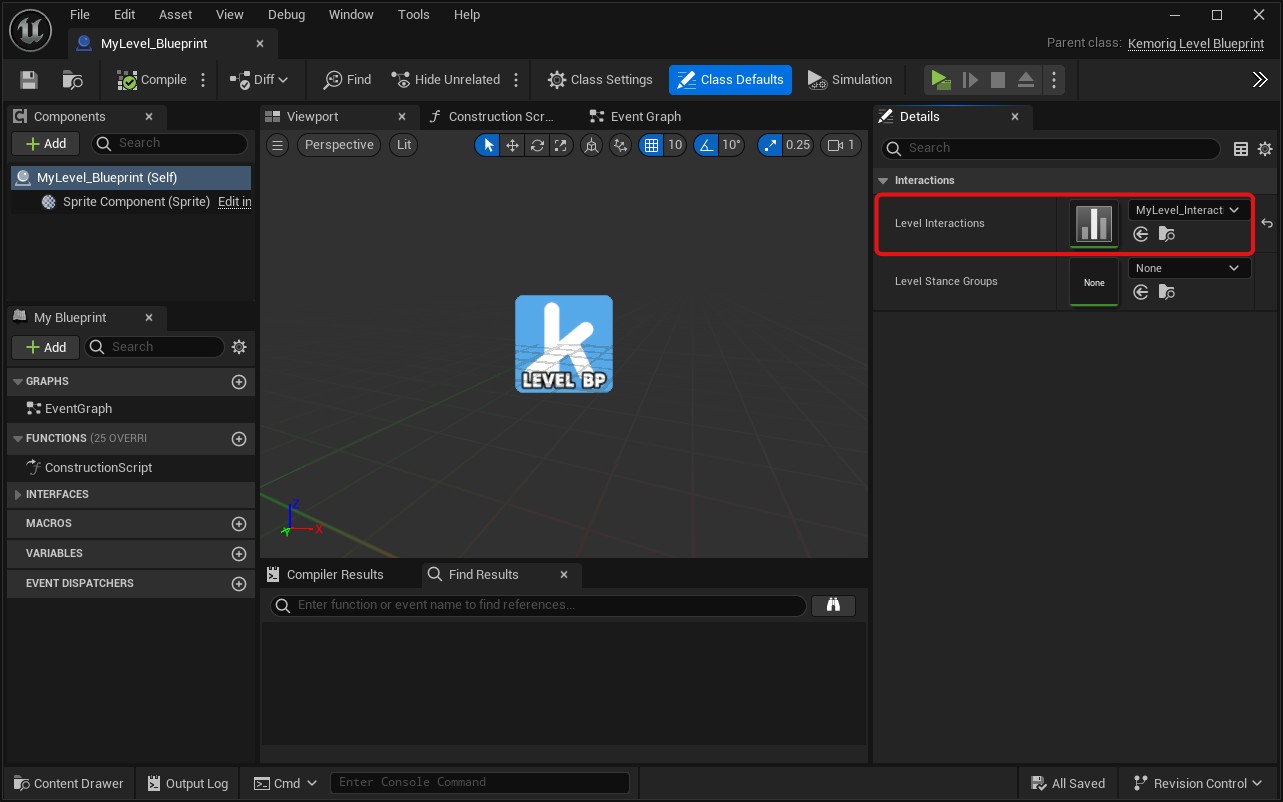
Now, Interactions will work with the Level. Any rows we add in the DataTable will create a new Interaction we can use in kemorig.
Adding New Interactions
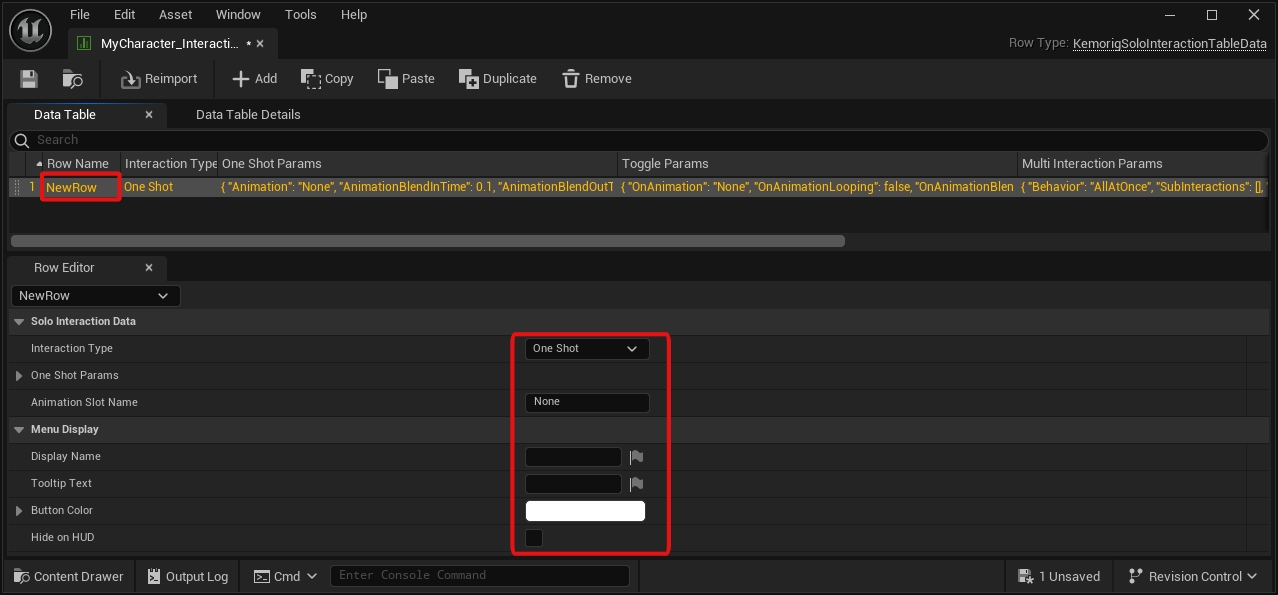
Open your interactions DataTable.
Click the Add button at the top to add a row.
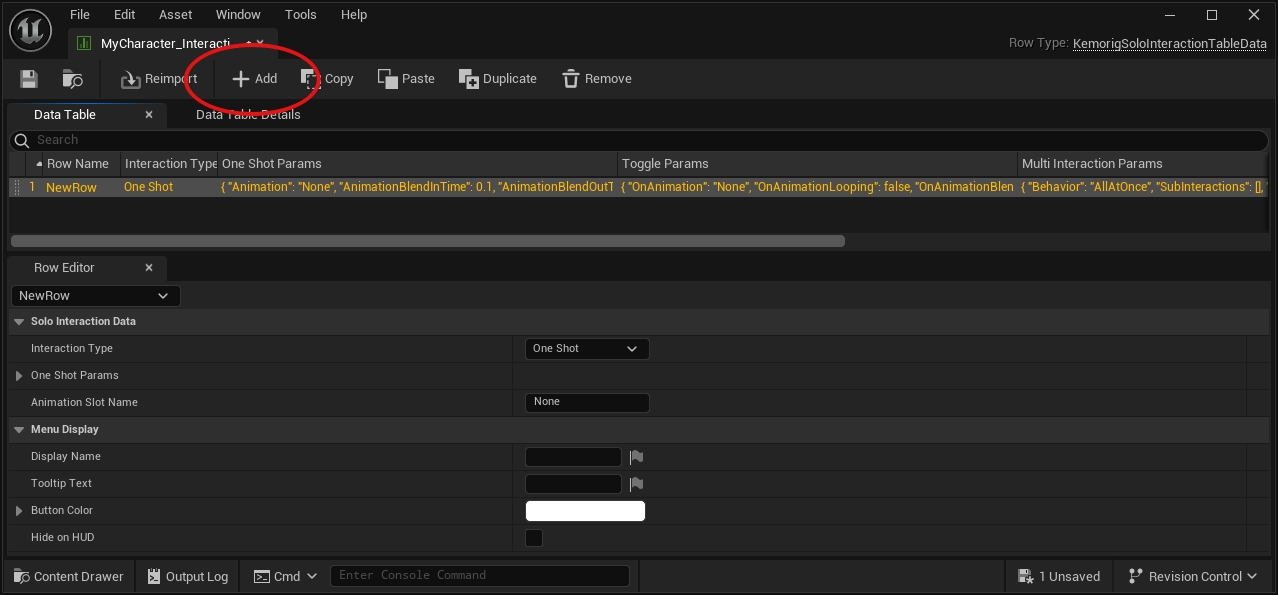
This row defines the Interaction:
- The Row Name is the name you’ll use to refer to the Interaction in Blueprints.
- The properties visible when you select the row define the Interaction’s behavior.
Interaction Types
Interactions can be one of 3 Types:
- One Shot - fire and forget, does the same thing every time it’s triggered.
- Toggle - has an on and off state.
- Multi Interaction - an Interaction that triggers other Interactions. Has these options:
- Random
- In Order
- All at Once
Built-In Features (Avatars Only)
Avatar Interactions have a few built-in features. These are controlled by filling out parameters in the DataTable.
Play Animations
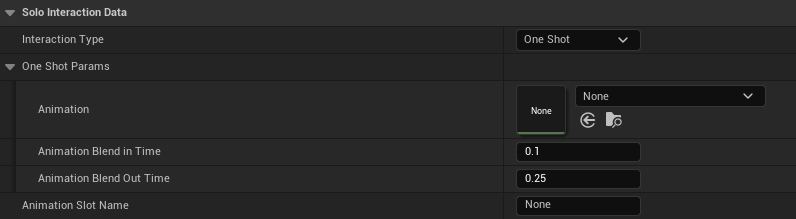
One Shot and Toggle Interactions can play animations on your avatar.
It does this using “Animation Slots”. For more information, see this page in Unreal’s documentation: Animation Slots
Be sure to use the Animation Slot Name property in the Interaction to designate what slot animations play in.
Toggle Bones

Toggle Interactions can toggle bones on your avatar mesh on or off.
You can enter either a bone name or a socket name (if you’ve added sockets to your skeleton).
Override Tracking Settings

Toggle Interactions can override an Avatar’s Tracking Settings.
The Override Priority setting determines how the Tracking Settings will stack with other overrides. See the Tracking Settings documentation for more info.
Set Camera Position

Toggle Interactions can set the camera to a Camera Position.
The Override Priority setting determines how this Camera Position will stack with others. See the Camera Positions documentation for more info.
Custom Blueprint Logic
Interactions allow you to run blueprint logic using events in any blueprint (often your Avatar Blueprint or Level Blueprint).
This is where the power of the Interaction system shines! You can implement virtually any feature you want.
Using “Interaction Played” Event
Interaction Played is a core kemorig event called when any Interaction is played.
You can implement this event, and branch based on the Interaction Name it reports.

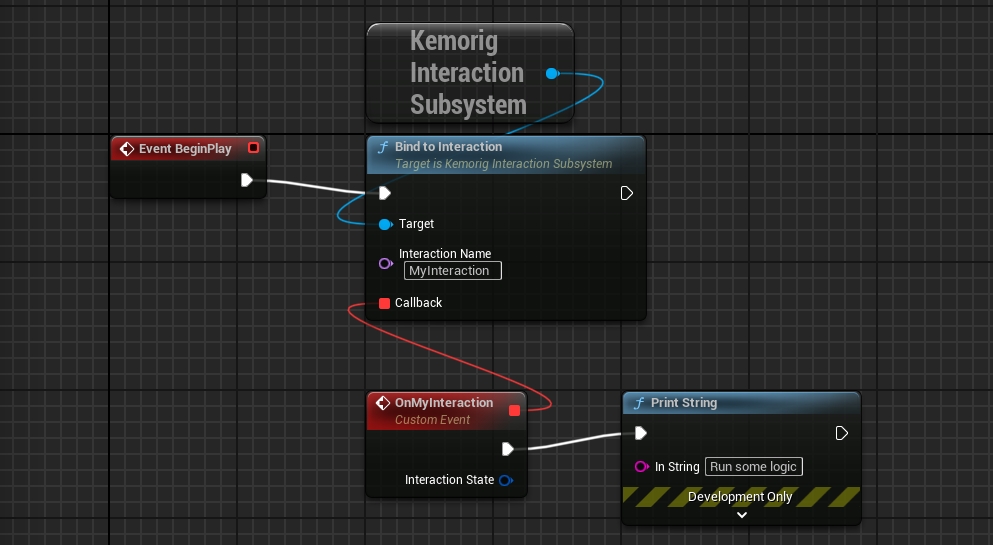
Using “Bind To Interaction”
Alternatively, you can bind an event or function to a specific Interaction.
To do this:
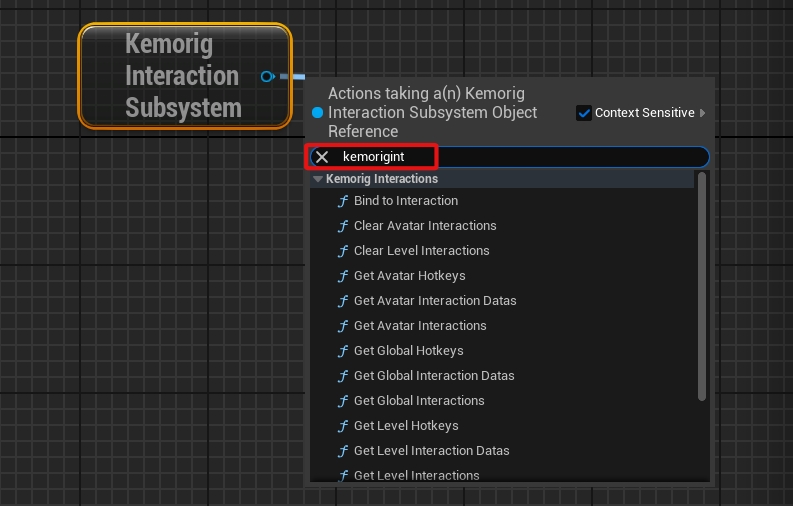
- Add a Get Kemorig Interaction Subsystem node to your blueprint.
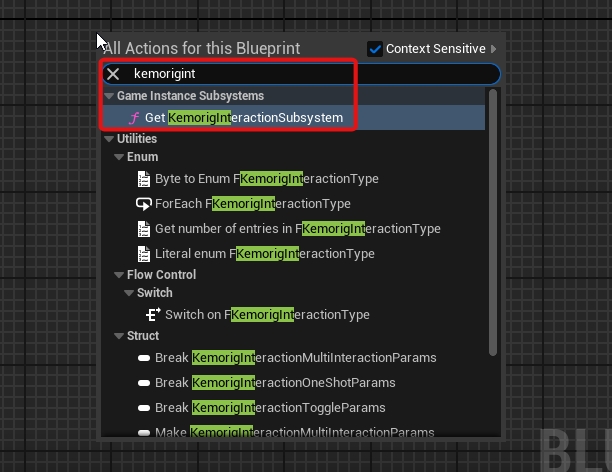
- Drag a pin out of it, and add a Bind to Interaction node.
- Enter the name of the Interaction you want, and create a callback (the callback is where your logic goes).
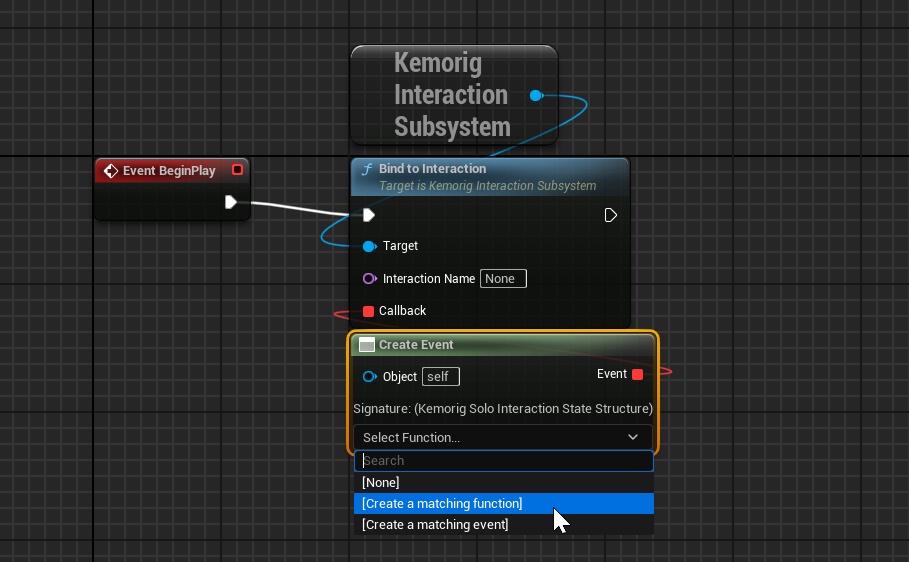
Handling with a function
When binding to Interactions, a useful trick is to use the “Create Event” node. It allows you to handle the event with a function in your Blueprint.
With complex blueprints, this can be helpful for organization.
More
To explore what else can do:
- Drag the pin out of a Get Kemorig Interaction Subsystem node and search for “Kemorig Interactions” functions.