Custom Package Setup (Old, pre-v0.8)
This is an old guide for pre-v0.8 kemorig versions. If you have a pre-v0.8 version, follow this guide after opening the kemorig_editor project in the Editor Setup guide.
Now that you’ve completed the Project Setup guide, we need to configure the kemorig_editor project to export a .pak of our custom content.
We’re going to configure the editor to create a “DLC” package for the app.
You only have to do this process once. After you're set-up, exporting your content takes one-click.
Make A New Plugin
Let’s get started by making a plugin for our custom content.
Open the kemorig_editor project and navigate to Edit > Plugins.
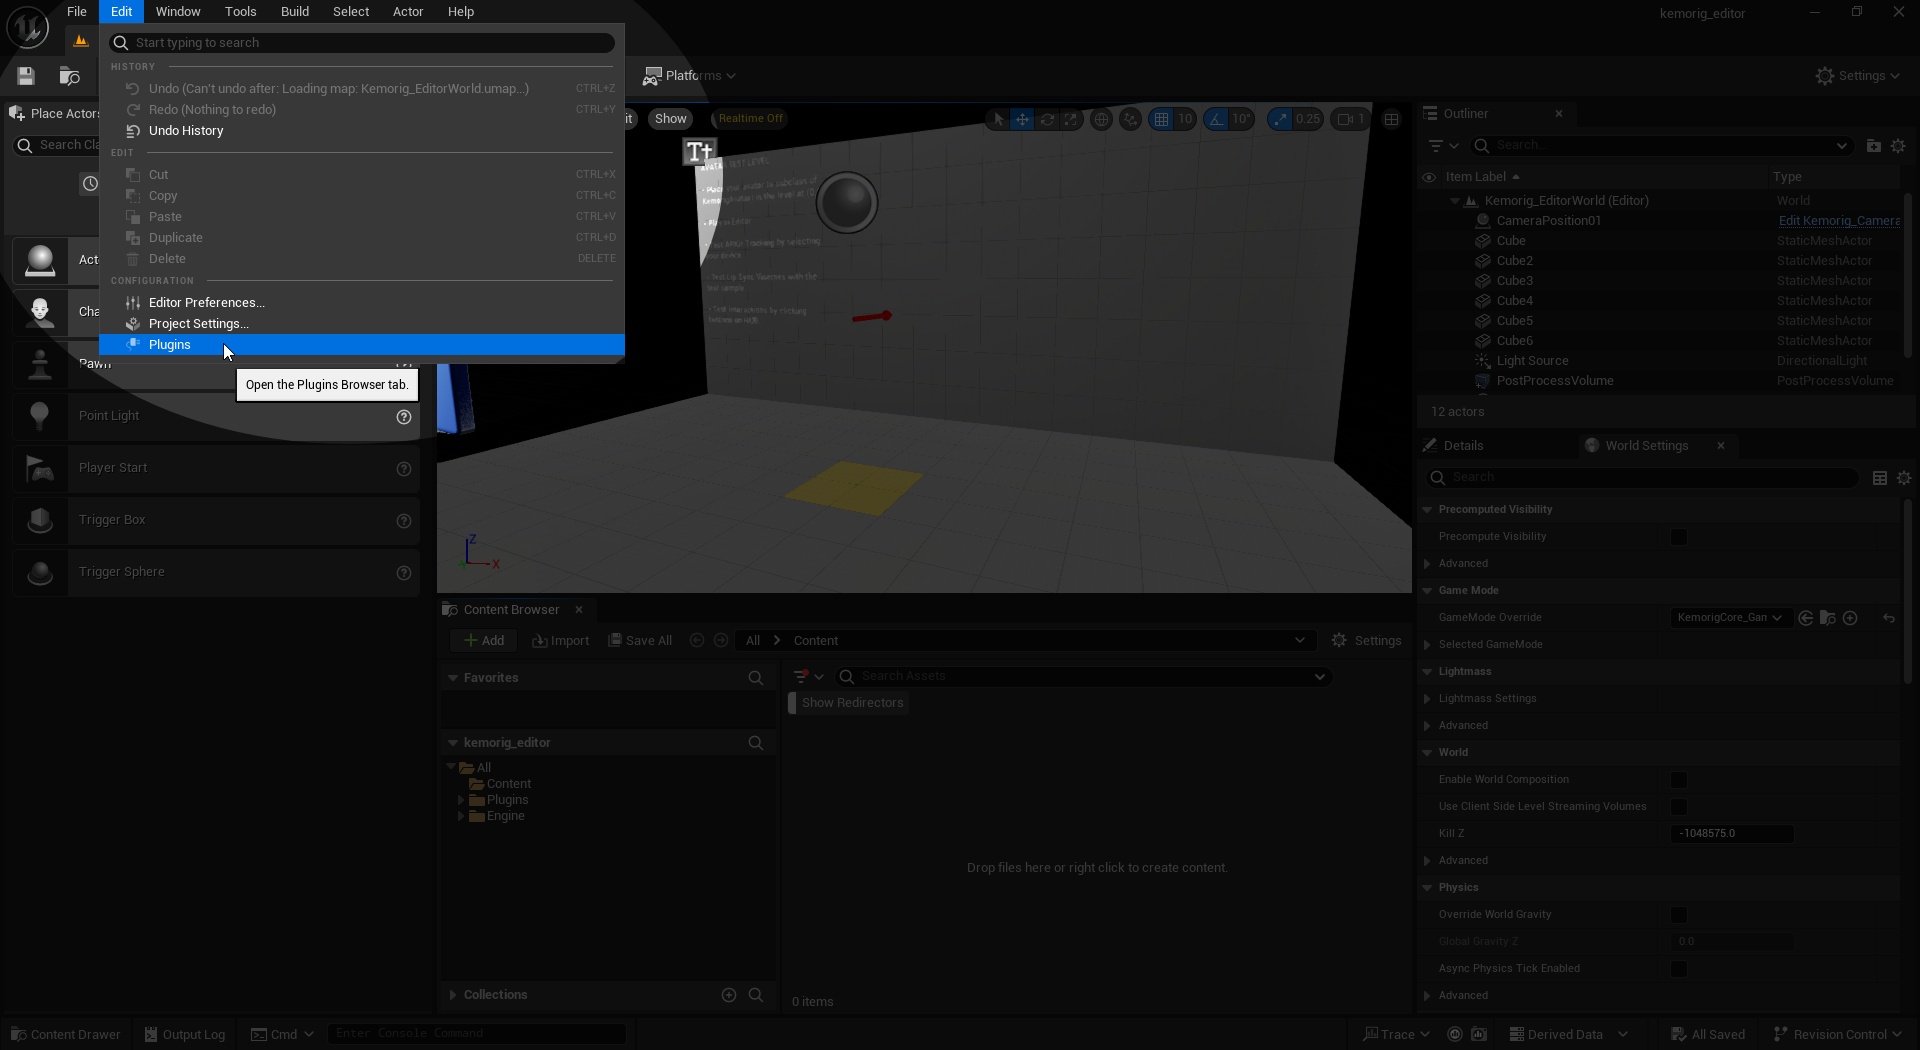
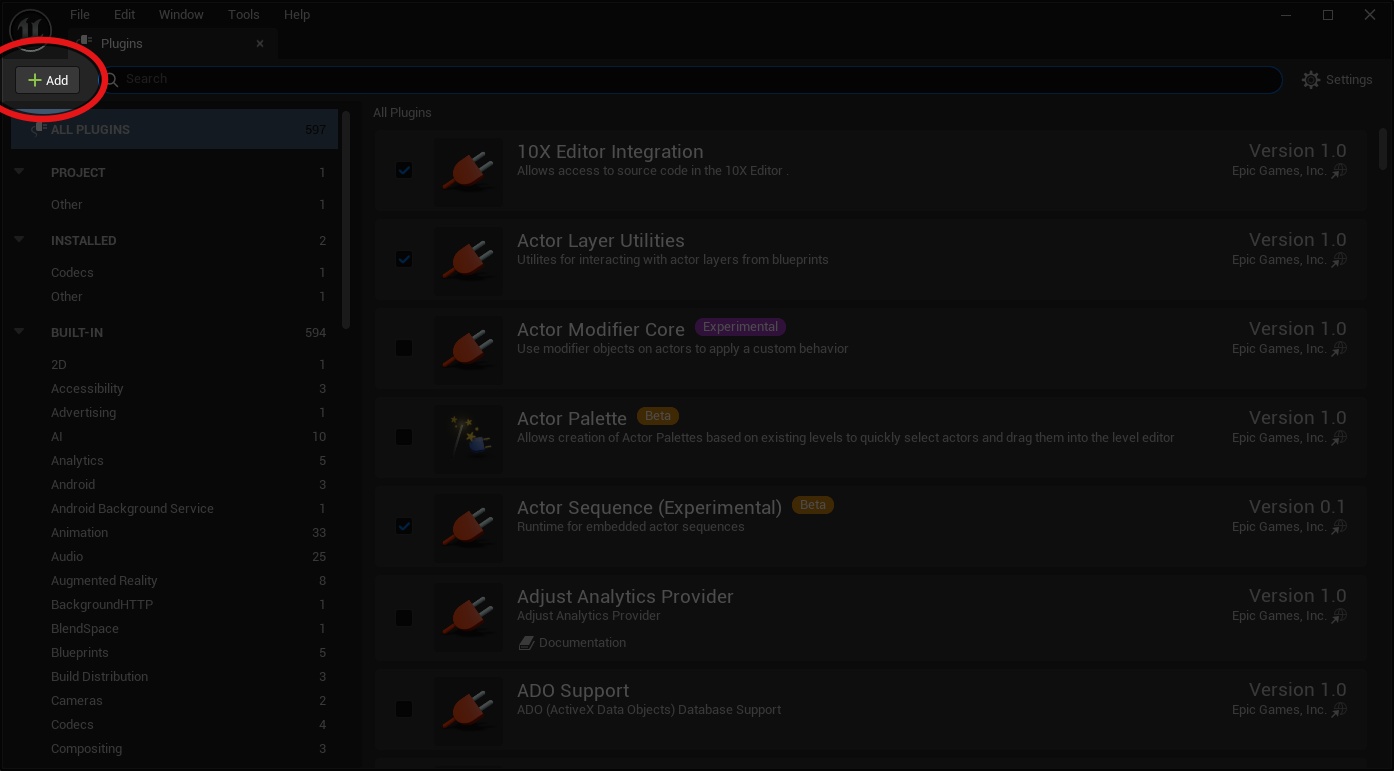
In the window that appears, click the Add button on the top left.
Next, set the basic settings for our new plugin. Select Content Only, give it a name, and set any optional data you want.
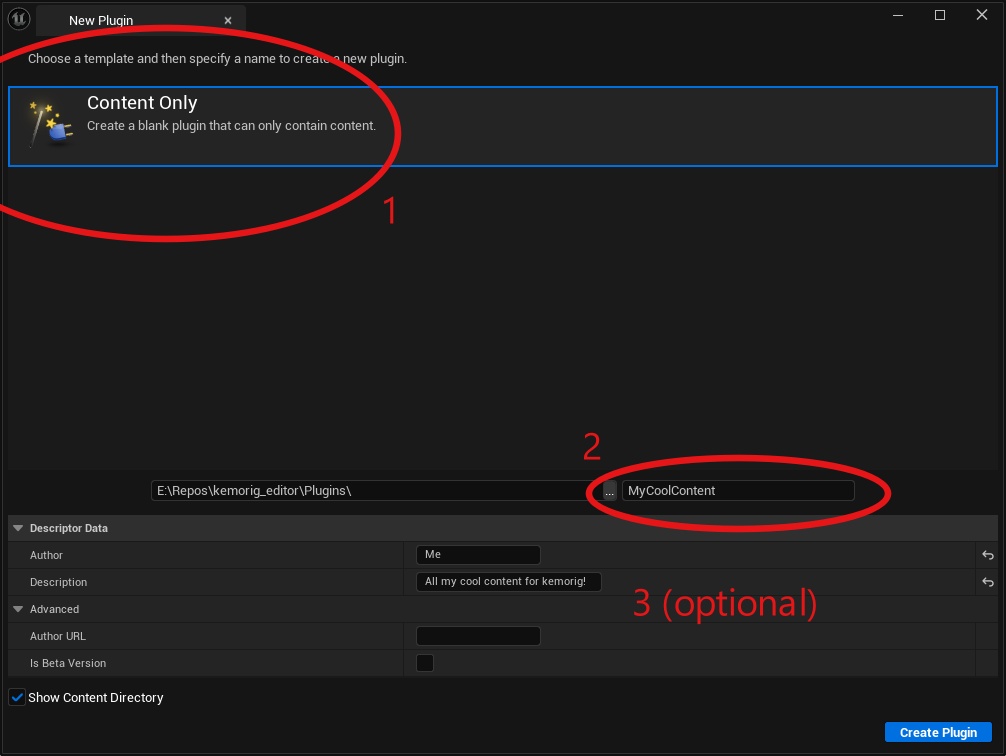
Don't name it "My Cool Content" (unless you want to), that's just an example.
Click Create Plugin. Your new plugin is ready! Find it in the Content Browser.
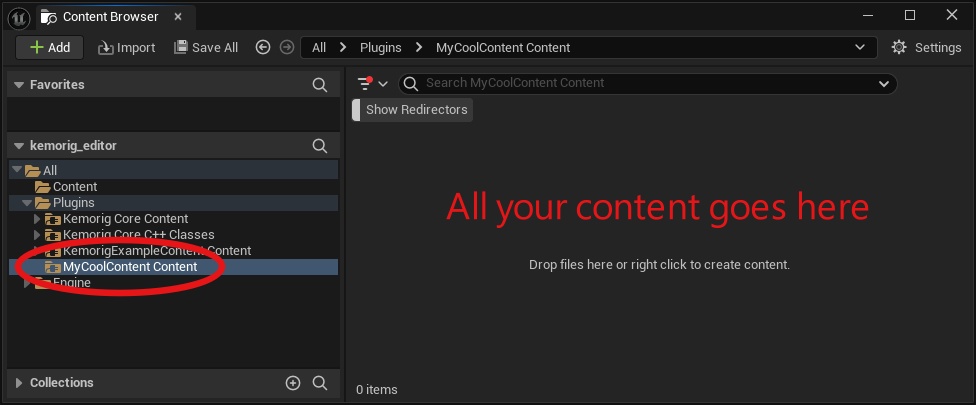
All content you create must be inside this plugin folder, or a sub-directory of it. This is the root folder that will be exported with your custom package.
Create A Launch Profile
Next, we need to tell the Editor how to export our content. To do this, we need to create a Launch Profile in the Project Launcher window.
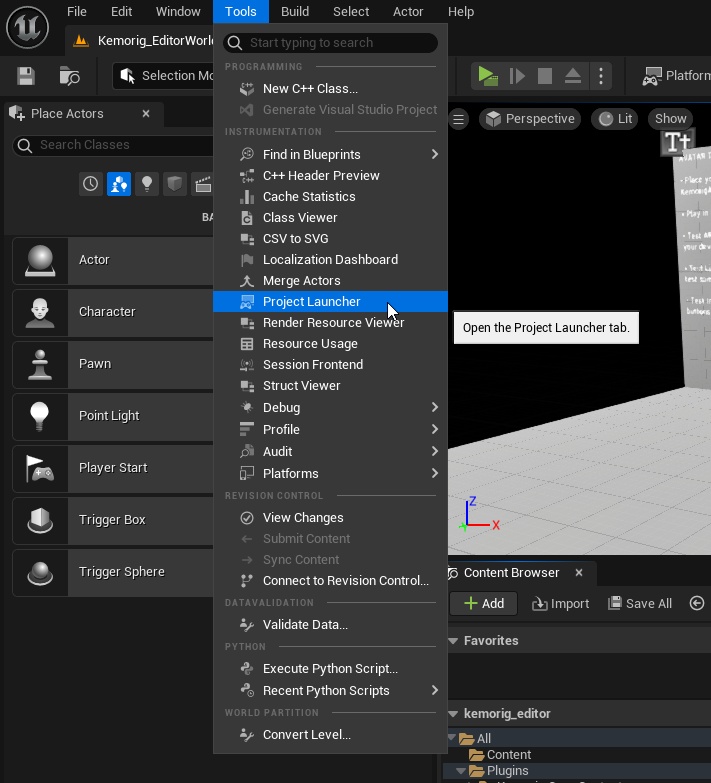
Navigate to Tools > Project Launcher to open the Project Launcher window.
Next, add a Custom Launch Profile by clicking the Add button.
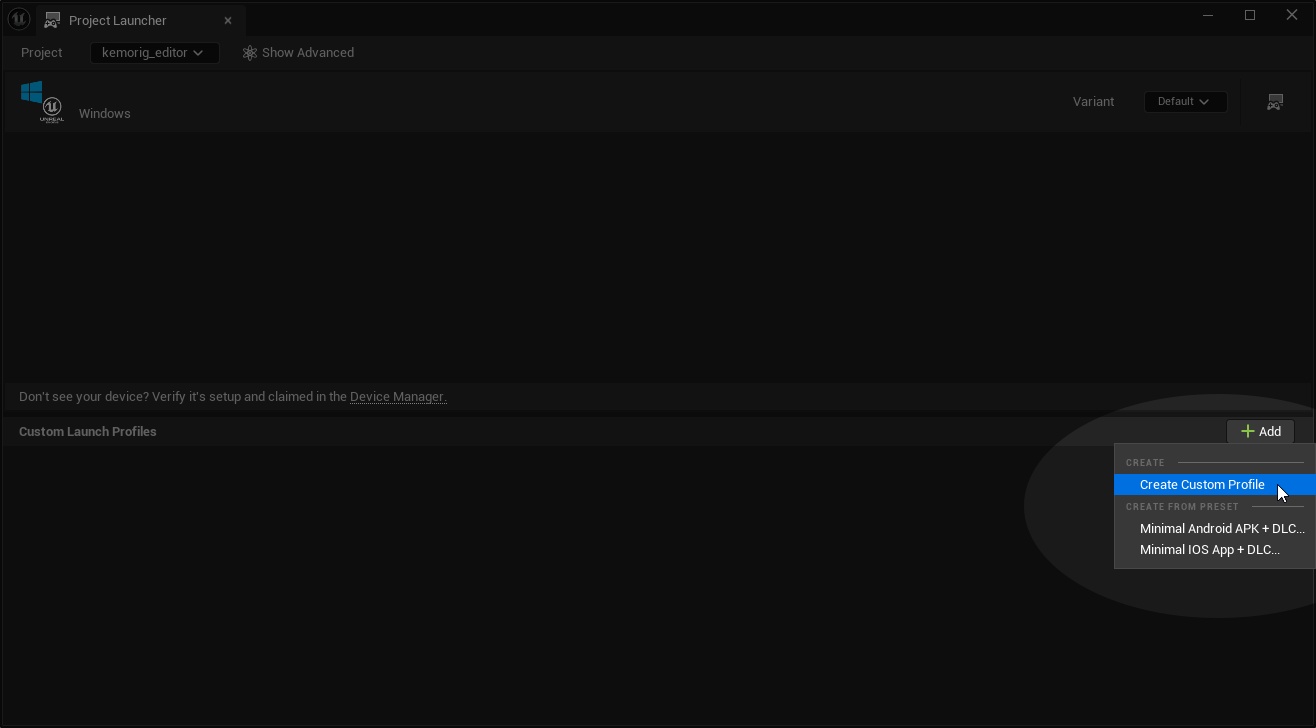
This will automatically open the new profile’s settings page.
Configure Launch Profile
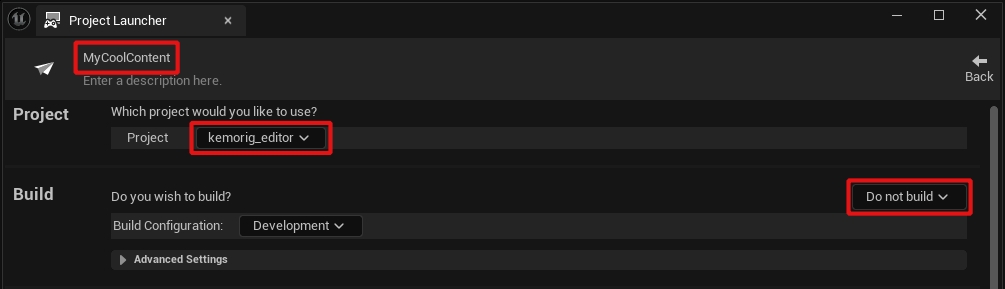
- At the top, give it a descriptive name (for example your plugin name)
- In Project, click the dropdown, browse and find the kemorig_editor project (even if it already says the name, the profile might fail if you don’t manually set it!)
- In Build, on the right, select “Do not build”
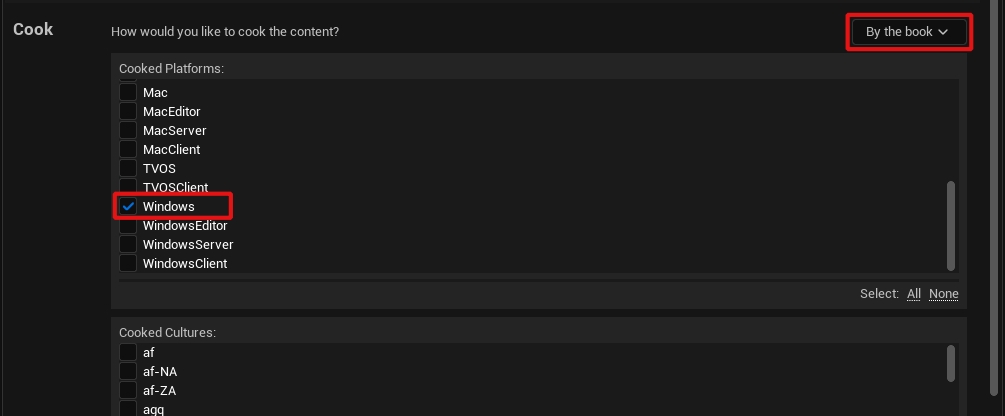
In Cook:
- On the right, select “By the book”.
- In Cooked Platforms, scroll down and select “Windows”.
Further down in Cook:
- Expand the box for “Release / DLC / Patching Settings”
- Enable “Create a release version of the game for distribution”
- Under “Release version this is based on”, enter “release”
- Enable “Build DLC”
- Under “Name of the DLC to build”, enter the name of your plugin (this must match exactly and is case-sensitive!)
- Enable “Include engine content”
- Under “Advanced Settings”, enable only “Compress content”, “Save packages without versions”, and “Store all content in a single file (UnrealPak)”

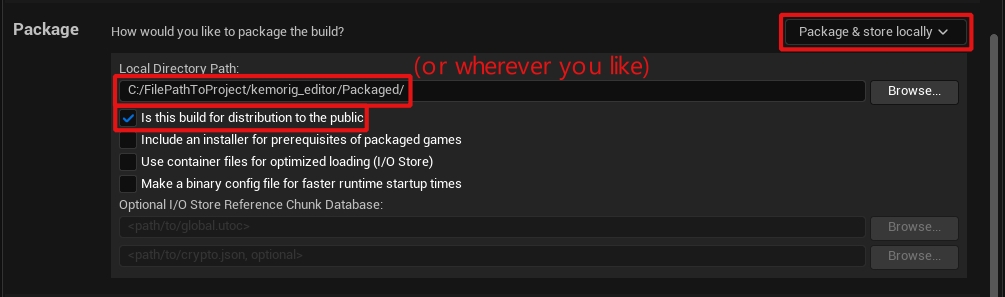
In Package:
- On the right, select “Package & store locally”
- In “Local Directory Path”, enter any directory you like. I like to use PROJECTFOLDER/Packaged/
In Deploy:
- On the right, select “Do not deploy”

You’re done! Click the Back button in the top right to back out to the previous menu.
Run the Launch Profile
Now inside the Project Launcher window, you can run your Launch Profile by clicking the button on the right side of it.
Add a Blueprint to Test
There is a bug causing Launch Profiles to misbehave and potentially fail when running with an empty Content folder.
When testing your Launch Profile, make sure you add (and save) at least 1 asset first.
Before testing your Launch Profile, add (and save) at least 1 asset to your plugin’s Content folder.
You can right click your Content folder and add a Blueprint asset to test. Name it whatever you like, and save it (you can delete this test asset once you begin working on your avatars and levels).
Test the Launch Profile
Back inside Project Launcher window, run your Launch Profile by clicking the button on the right side of it.
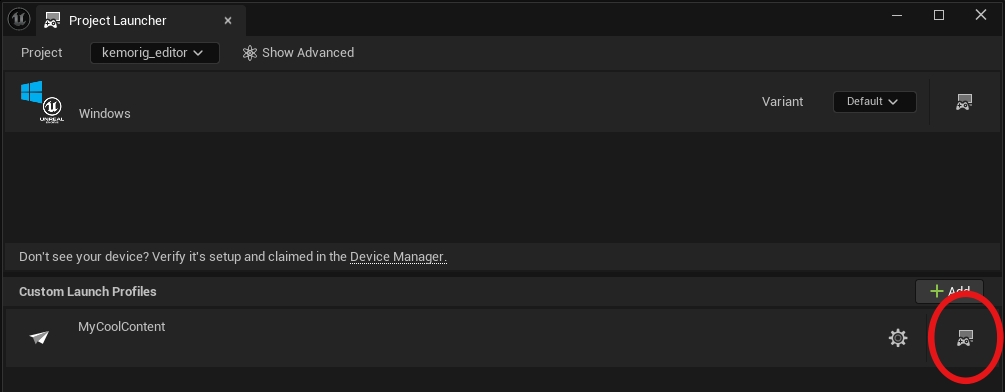
Clicking that button will kick off a build, and a .pak will be generated in a sub-directory of the folder you specified.

Ensure that you get all green checkmarks on this test run. If it does not succeed, look for red text in the output log for errors. You may have missed a setting in the Launch Profile.
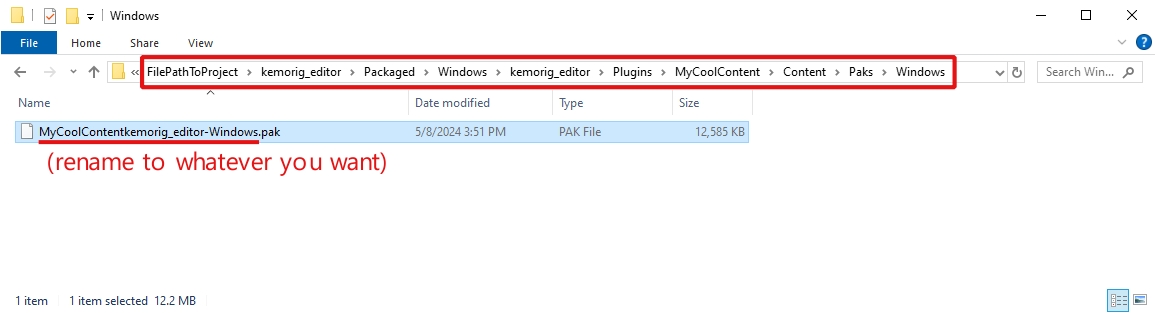
Find the .pak File
Now let’s find the .pak file. A quirk of the packaging process is that it’s buried deep in sub-folders, but just drill down to the end to find it.
This is the file you drop into the kemorig/UserContent/ folder in the app to use your content.
Extra notes about this pak file:
- If you’re testing for the first time after following the steps above, you should find a pak file with a very small size (less than 1 MB).
- You can rename the .pak file to whatever you like (for example the plugin name).
Next Steps
Now you’re ready to create custom content for kemorig! You can enjoy a nice clean pipeline for creating content.
If you’re new to Unreal, this page can give you some tips to get started:

Unreal Beginner Tips
A quick intro to Unreal with helpful tips for beginners
If you want to get started making avatars or levels, start here:
Avatar Authoring Basics
How to make an Avatar for kemorig
Level Authoring Basics
How to make a Level for kemorig