Blender for Unreal - Basics
Blender is a general-purpose, free and open source 3D package. It is also very popular among VTuber creators.
This page explains how to set it up for Unreal, and goes over things you should know.
Setup
Avoiding FBX Issues between Blender and Unreal
Unreal has issues importing FBX files from Blender’s default FBX exporter (more details here).
Use one of these Blender add-ons to avoid this problem:
- PROTO Game Asset Tools - free, more info below
- Auto Rig Pro - paid, includes a special FBX exporter
PROTO Game Asset Tools (Add-On)
This is a free Blender add-on I created to make it easier to work with Unreal. It exports FBX files properly for Unreal, and comes with extra goodies for improving Blender’s character workflow.
Learn more and download it here:

PROTO Game Asset Tools (for Blender)
protowlf.com
Set Length Units to Centimeters (Optional)
In Unreal, 1 unit equals 1 centimeter. It’s convenient to also use centimeters in our scene.
In Blender, on the right side of the screen, find Scene Properties > Units and set Length to Centimeters.
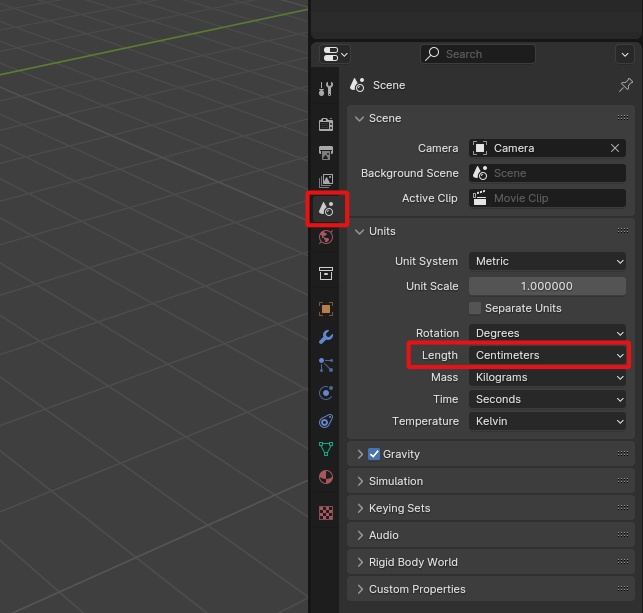
Do not adjust the Unit Scale parameter, which is 1.0 by default. Some outdated online tutorials recommend adjusting it for Unreal. Do not do this.
Coordinate System Differences
Blender uses a right-handed coordinate system, whereas Unreal uses a left-handed one.
With default exporter/importer settings, basically think of it as the Y-axis flipping in Unreal.
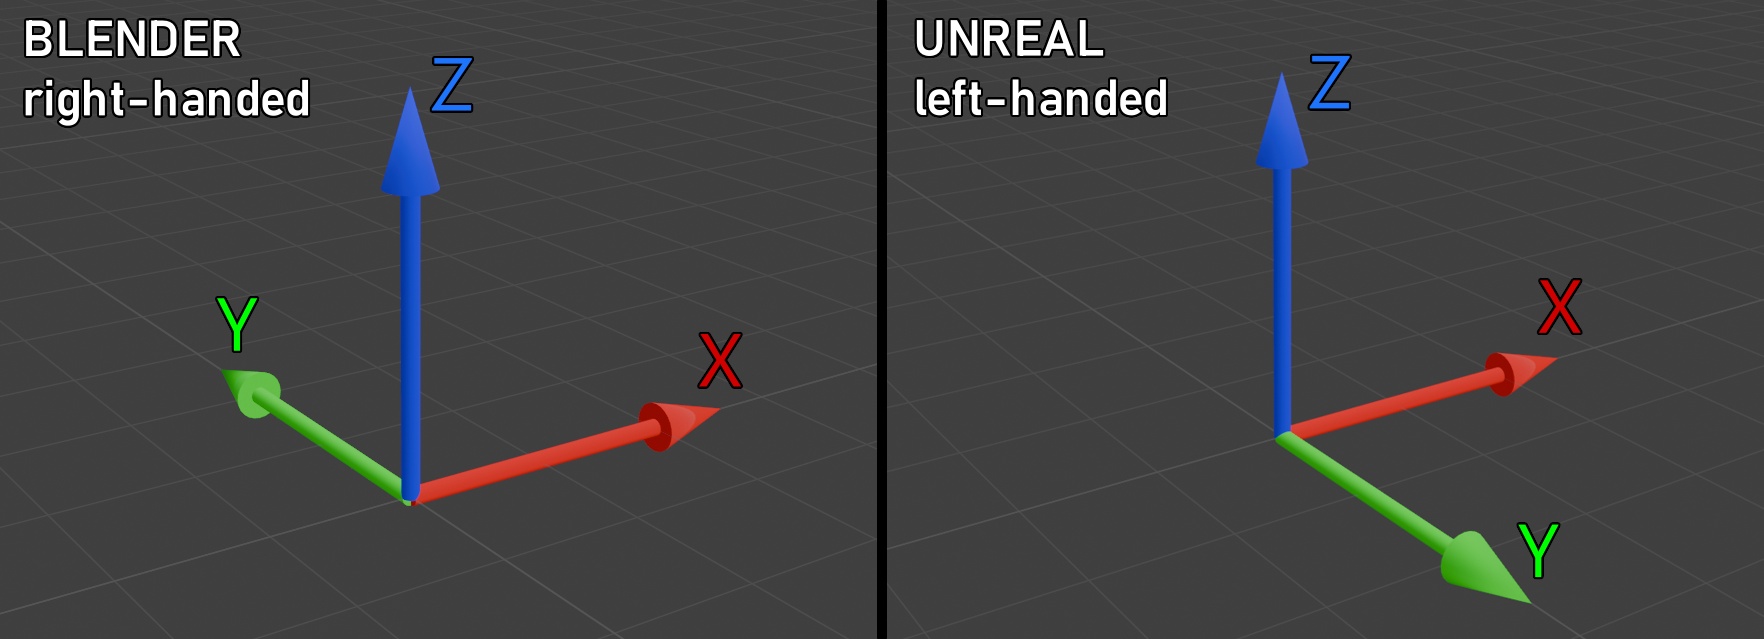
For the most part, you can ignore this discrepency. Default FBX exporter and importer settings will convert coordinate systems correctly.
Bone Differences
Blender’s bones are fully compatible with Unreal, but they are represented differently.
Blender Bones
- Consists of a head and a tail, with a shaft in-between. The bone’s origin is at the head, and it is oriented such that the Y-axis of the bone points toward the tail.
- In a heirarchy, they can be either connected or disconnected.
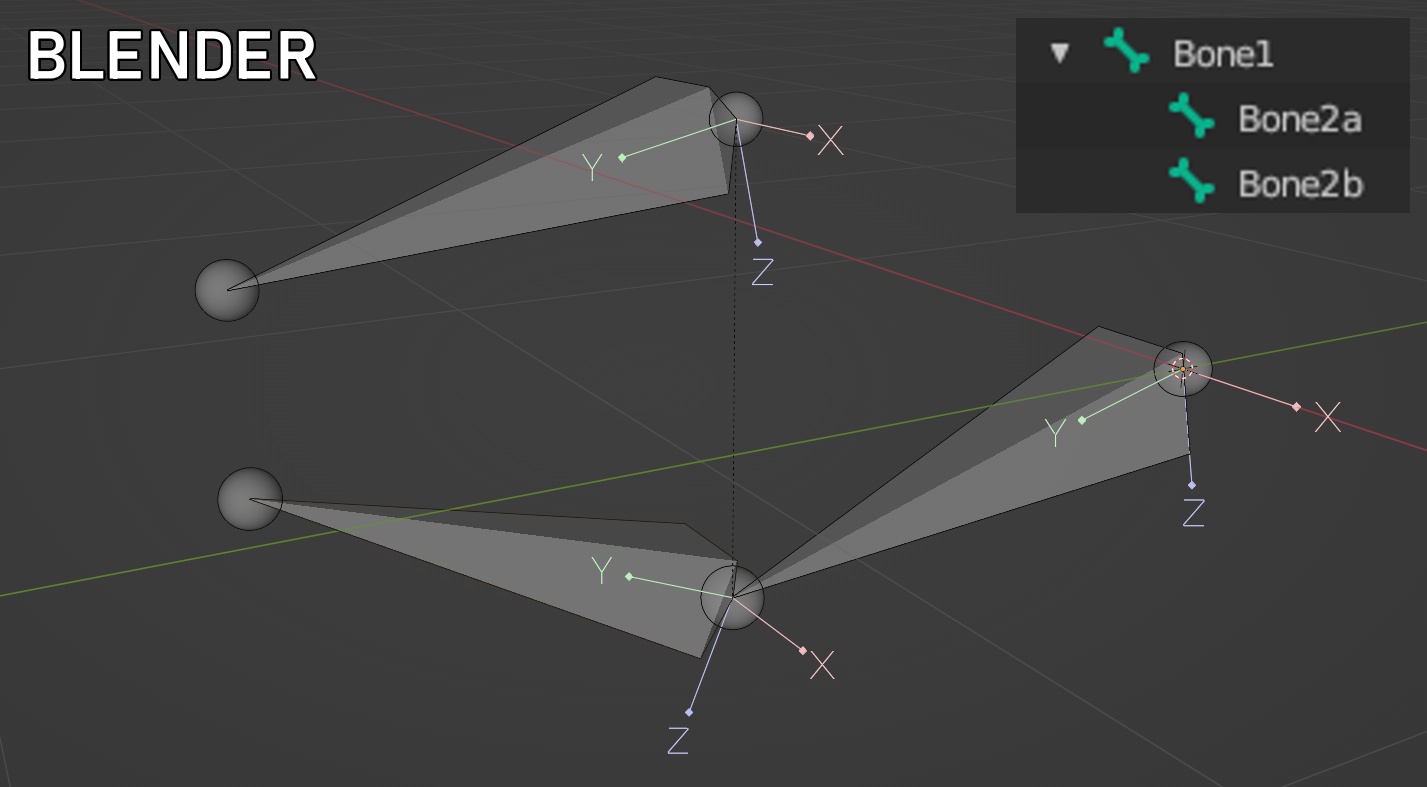
This example shows 3 bones. Bone1 is the root, and Bone2a and Bone2b its children. Bone2a is connected, and Bone2b is disconnected.
Unreal Bones
- Represented by a single point, with any orientation.
- In a heirarchy, shafts will be drawn between a parent and its children.
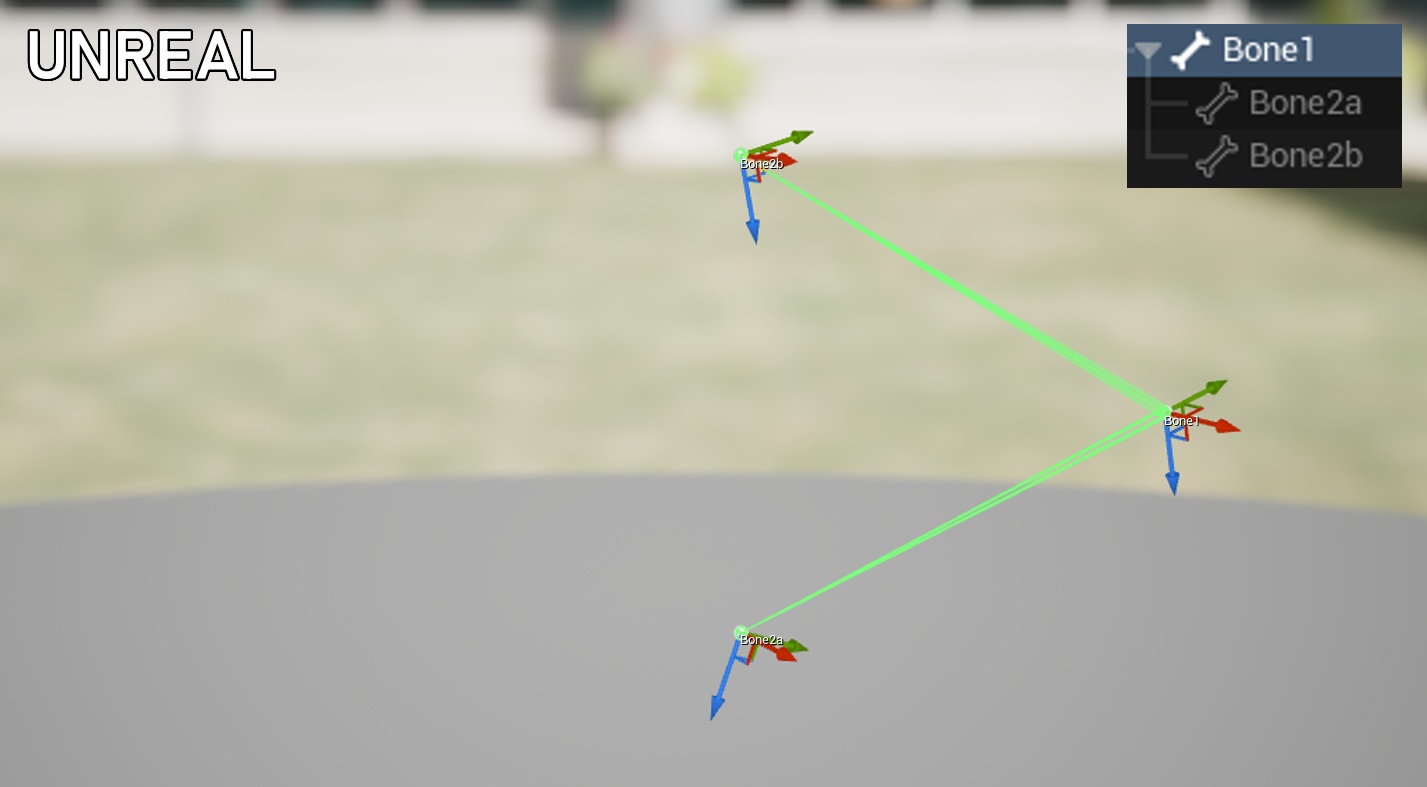
Yes, this is the exact same skeleton as above.
Even though Bone2a and Bone2b don’t have a shaft drawn, they work identically to the Blender skeleton.
You’ll also notice the flipped Y-axis, due to Unreal’s left-handed coordinate system.
Blender export with “Add Leaf Bones” (Bad)
DO NOT USE THIS OPTION. This section only exists because it's a common point of confusion.
Blender’s default FBX exporter has an option to “add leaf bones”, which is enabled by-default. What this does is add extra bones to the ends of the skeleton.
This is what the same skeleton above looks like in Unreal with “add leaf bones” enabled:
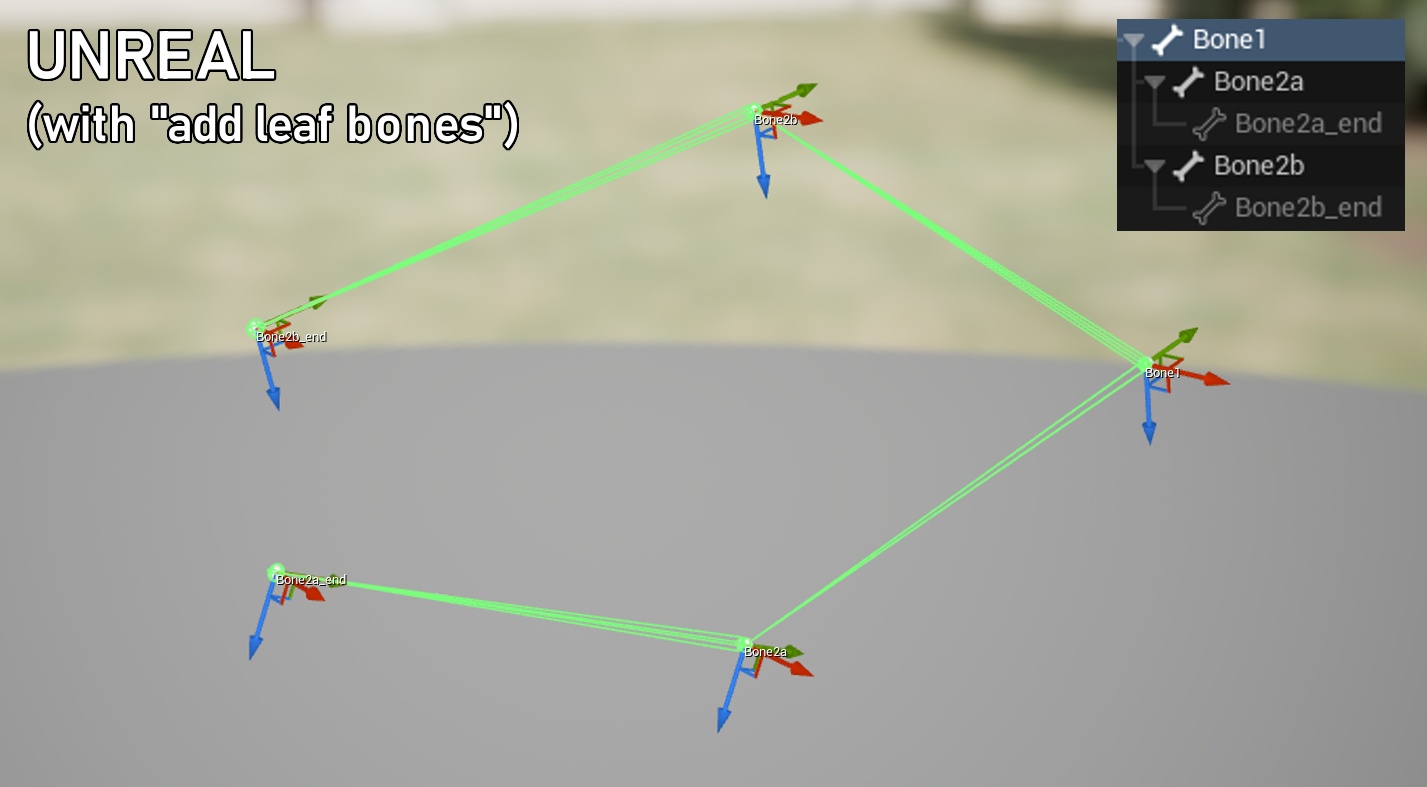
Do NOT use this option when exporting for Unreal. This adds extra unused bones to your skeleton, which is wasteful and confusing.
Remember to disable this option when exporting your character model.
Blender Add-Ons
Notable add-ons for Blender.
Recommended
- Made by me, for kemorig
- Contains FBX exporter that works with Unreal
- Extra goodies for improving Blender's character workflow
- Contains FBX exporter that works with Unreal
- Great character rigging tool, will help you rig characters faster
- Relatively expensive for hobbyists, but high quality
- Tool for rigging humanoid characters
- Personally I think it is overly-complicated, I only semi-recommend it, but it can be helpful for rigging beginners
- If you don't want to rig by-hand, and Auto Rig Pro is too expensive, try Rigify
Some online tutorials may mislead you into thinking Rigify is required to rig characters in Blender. This is not true. Rigify is an optional tool.
Not Recommended
- Epic has stopped supporting it
- Does not fix FBX issues with Unreal
- Workflow is intrusive and inflexible, I do not recommend it for creating characters
Next Steps

Blender - Building and Exporting Characters
Helpful info for building a character in Blender and exporting for Unreal