Camera Positions
You can add Camera Positions to your Avatars and Levels, and create logic to move the camera with them.
Camera Positions are a great tool to bring your Avatar to life. For example, you can make unique camera angles for each Stance your Avatar uses.
It is possible to save "Camera Presets" in the app, but Camera Positions in your assets gives you more control, and allows you to smoothly transition between positions.
Adding a Camera Position - Avatars
For Avatars, add Camera Position Components to your Avatar Blueprint:
- Open your Avatar Blueprint
- In the Components tab (on the left side), click Add
- search for “camera” and find the Kemorig Camera Position component, and click to add one
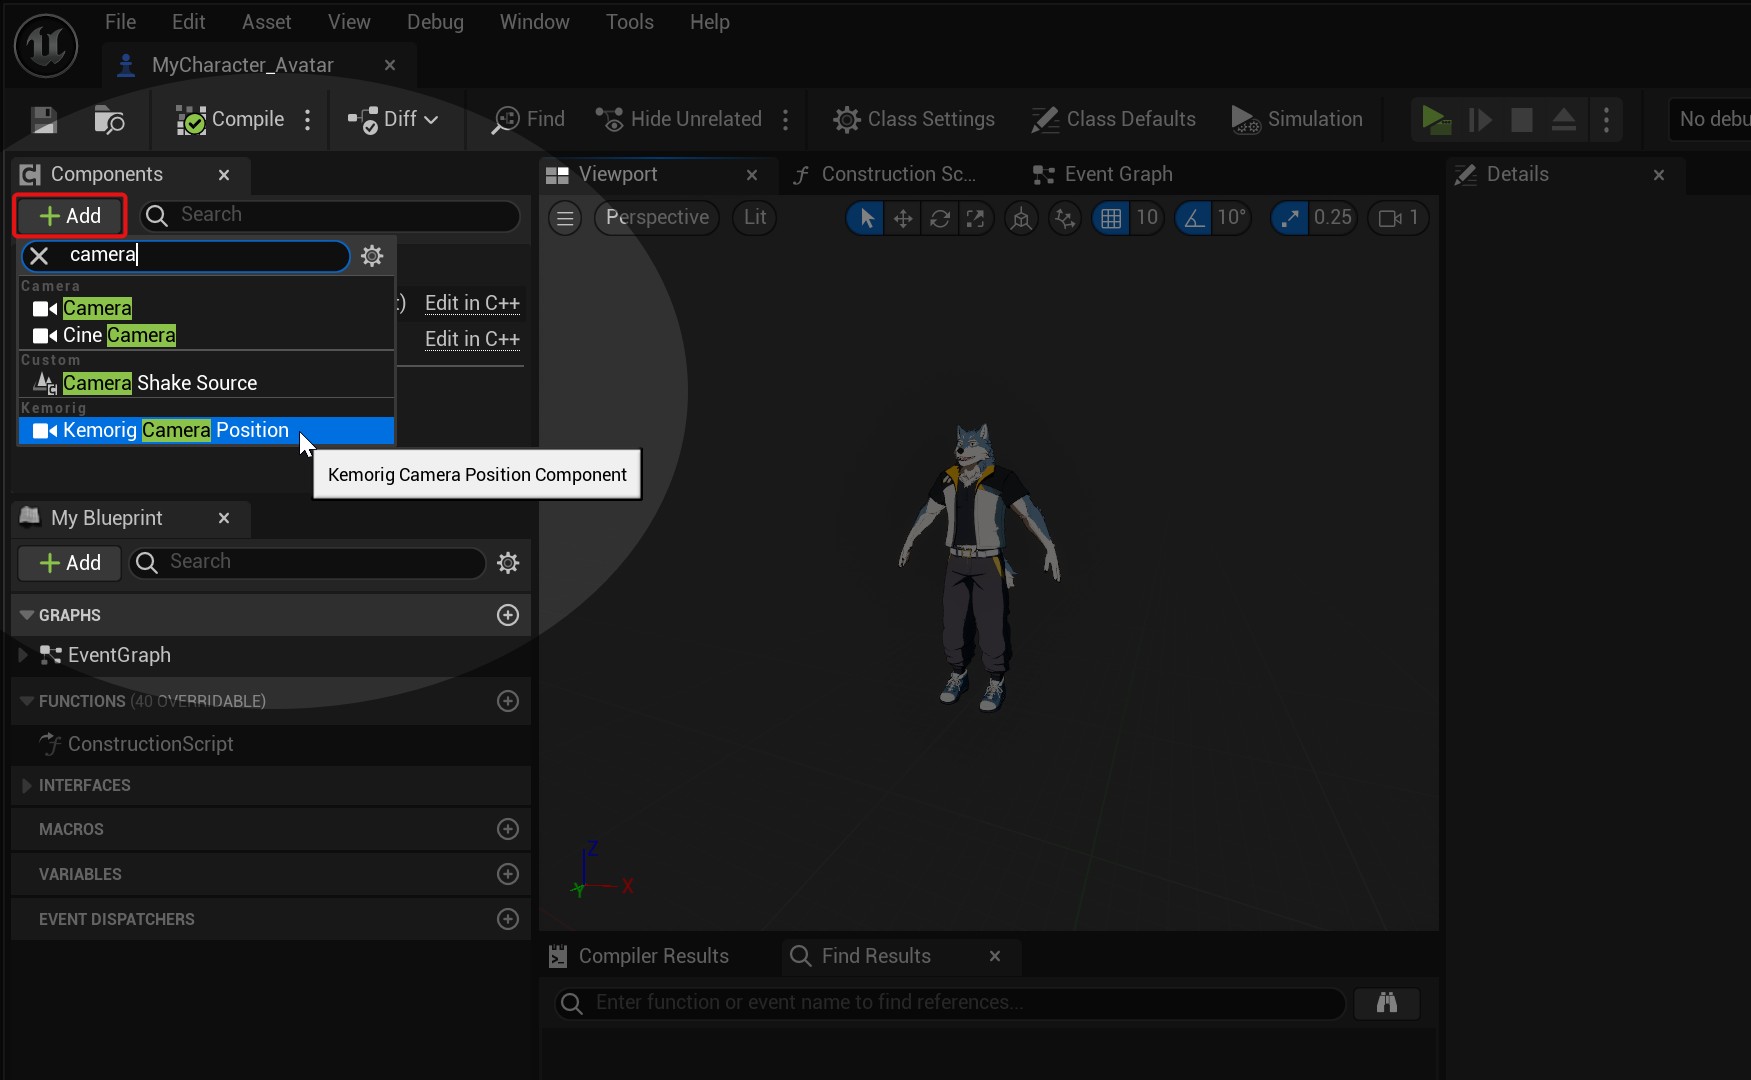
Now you can tweak this Camera Position using the gizmo in the viewport, and the properties in the Details panel.

You can add any number of Camera Position Components to your Avatar Blueprint.
Adding a Camera Position - Levels
For Levels, add a Camera Position Actor to your Level.
In the Content Browser, navigate to Kemorig Core Content/LevelActors/ and find the Kemorig_CameraPosition class.
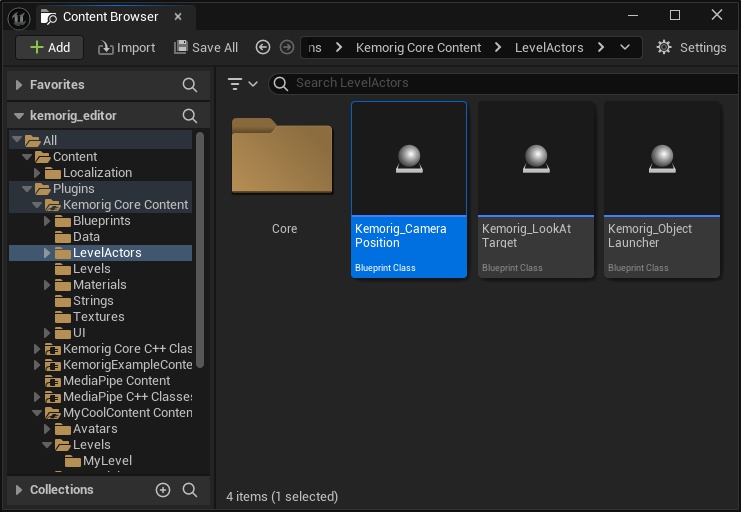
Drag Kemorig_CameraPosition into your level to create an actor instance of it. This is your new Camera Position.
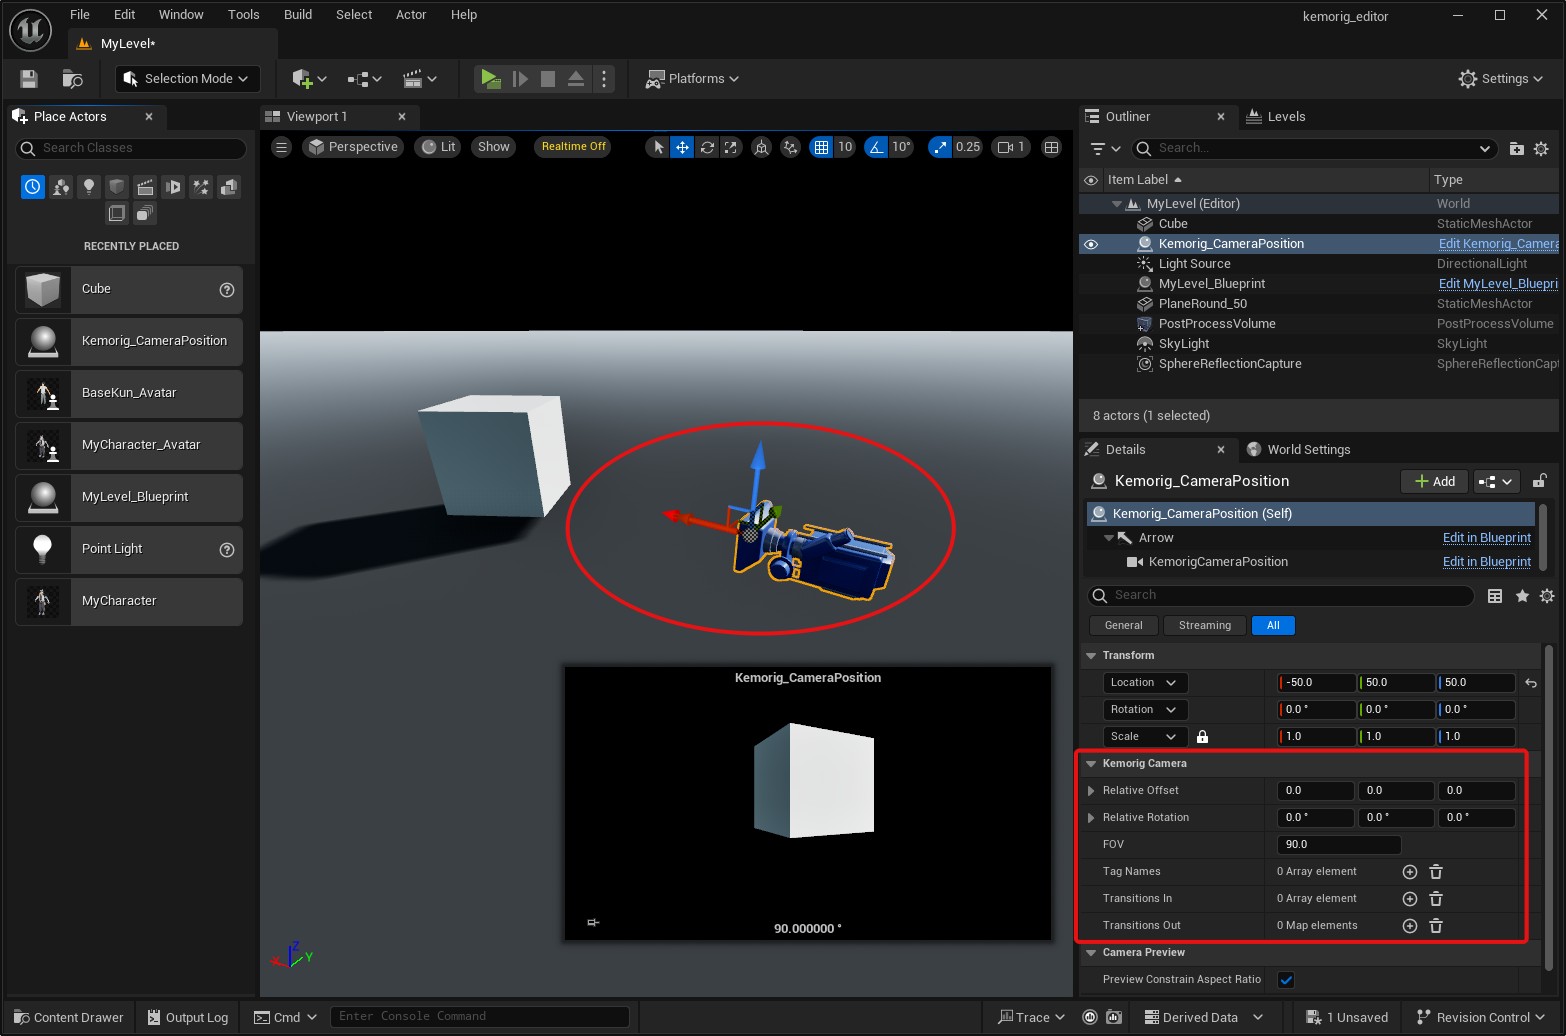
With the actor selected, you will see a picture-in-picture preview of the camera in the corner of the viewport.
Configuring a Camera Position
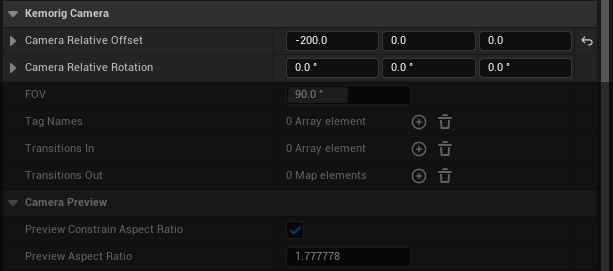
Pivot and Relative Offset
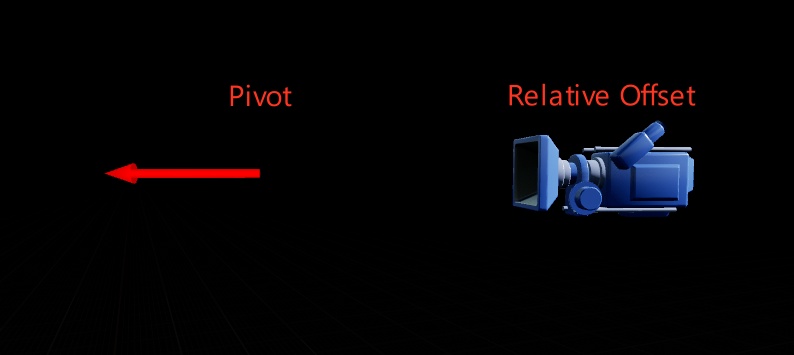
A Camera Position consists of two elements:
- a Pivot
- a Relative Offset
To position a Camera Position, do the following:
- In the Viewport, with the Camera Position selected, move the gizmo where you would like the Pivot to be.
- In the Details panel, adjust the Relative Offset and Relative Rotation parameters. You will see the blue camera model move as you do.
Why Use a Relative Offset?
The Pivot / Relative Offset positioning matters when blending between positions.
If you script the camera to blend between multiple Camera Positions, you typically want your Avatar to stay in-frame during the transition. Keeping Pivot points at the Avatar will ensure that the camera will keep looking at the Avatar as it blends.
FOV
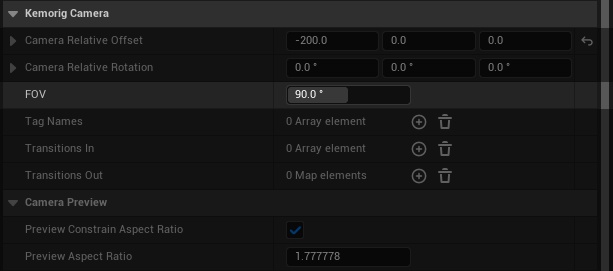
The FOV (or “field of view”) of the camera adjusts how zoomed-in it is.
The picture-in-picture preview will update as you adjust the FOV.
Tag Names

Tag Names are how you refer to this Camera Position in Blueprints, as well as Interaction/Stance definitions, and Transitions.
Typically you give a Camera Position just 1 tag name, but you can use multiple if you need to.
Transitions

Transitions are where you define smooth transitions between different Camera Positions.
- Transitions In - these definitions are how ALL other positions will transition INTO this position.
- If more than one is defined, one will be chosen at random.
- Transitions Out - these definitions are how this position will transition OUT to SPECIFIC other positions.
- If more than one is defined for a given tag name, one will be chosen at random.
Using Camera Positions in Blueprint
Kemorig comes with a suite of function to use Camera Positions. To find them, right click in an Blueprint and search for “camera”.
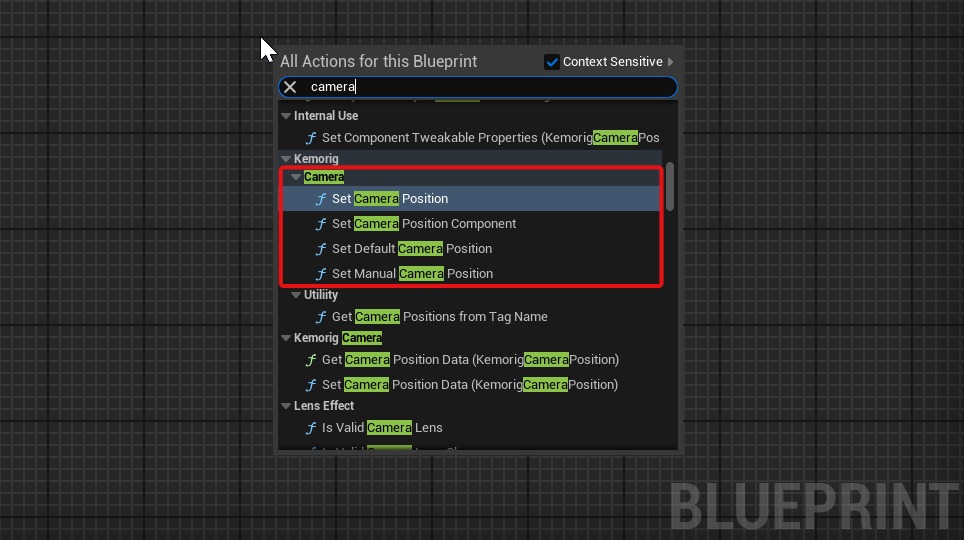

Blend the camera to the Camera Position with the given TagName
- Will use transitions defined on the Camera Positions
- Can optionally pass in a transition
- If OverrideDefaultTransition is false, then the Transition specified here will only be used if the Camera Position does not define a transition
- If OverrideDefaultTransition is true, then the Transition specified here will always be used
Same as SetCameraPosition, but pass in a Component directly (e.g. in an Avatar Blueprint)
Blend the camera to a manually-specified position
- Will use transitions defined on the Camera Positions
- Can optionally pass in a transition
Blend the camera to the Default Camera Position (as in, the default position when kemorig boots up)
- Can optionally pass in a transition
This node can be used to blend to a Camera Position (over the given time with the given easing function). It can also be used to snap directly to a Camera Position by using a blend time of 0.
Level Blueprint Example
In a Level Blueprint, we can snap to a Camera Position when a level begins by calling it from Event Level Begin:

The Kemorig Day example level shows further examples of setting the Camera Position in response to a Stance changing.
Warning: In Level Blueprints, use Level Begin, not Begin Play
In Level Blueprints, do not set the camera using the default Begin Play event. This will not work!
The Level Begin event is specific to kemorig, and will run at the right time for camera logic to work.

