Avatar Authoring - Creating Poses in Unreal
How to pose your avatar using Unreal.
This page offers multiple options for creating a pose.
Preferably, avatar animations are authored in a 3D package (e.g. Blender, Maya) and imported into Unreal. The methods on this page are an alternative if that is not an option.
Create a 1-Frame Sequence Using the Model Viewer
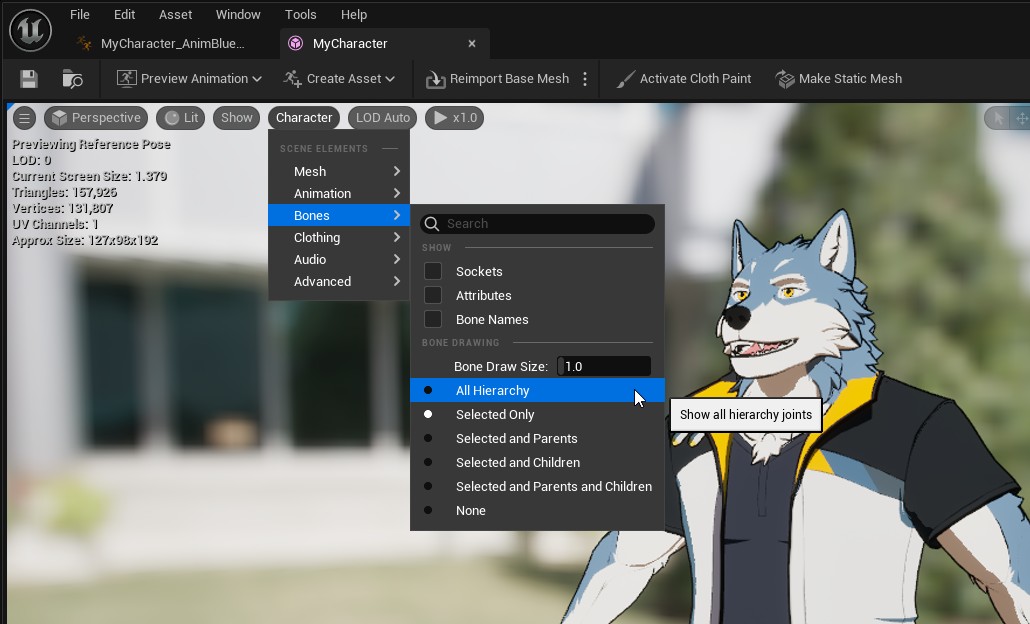
Open your avatar’s skeletal mesh asset in Unreal.
Make the skeleton visible by selecting Character > Bones > All Hierarchy in the viewport.
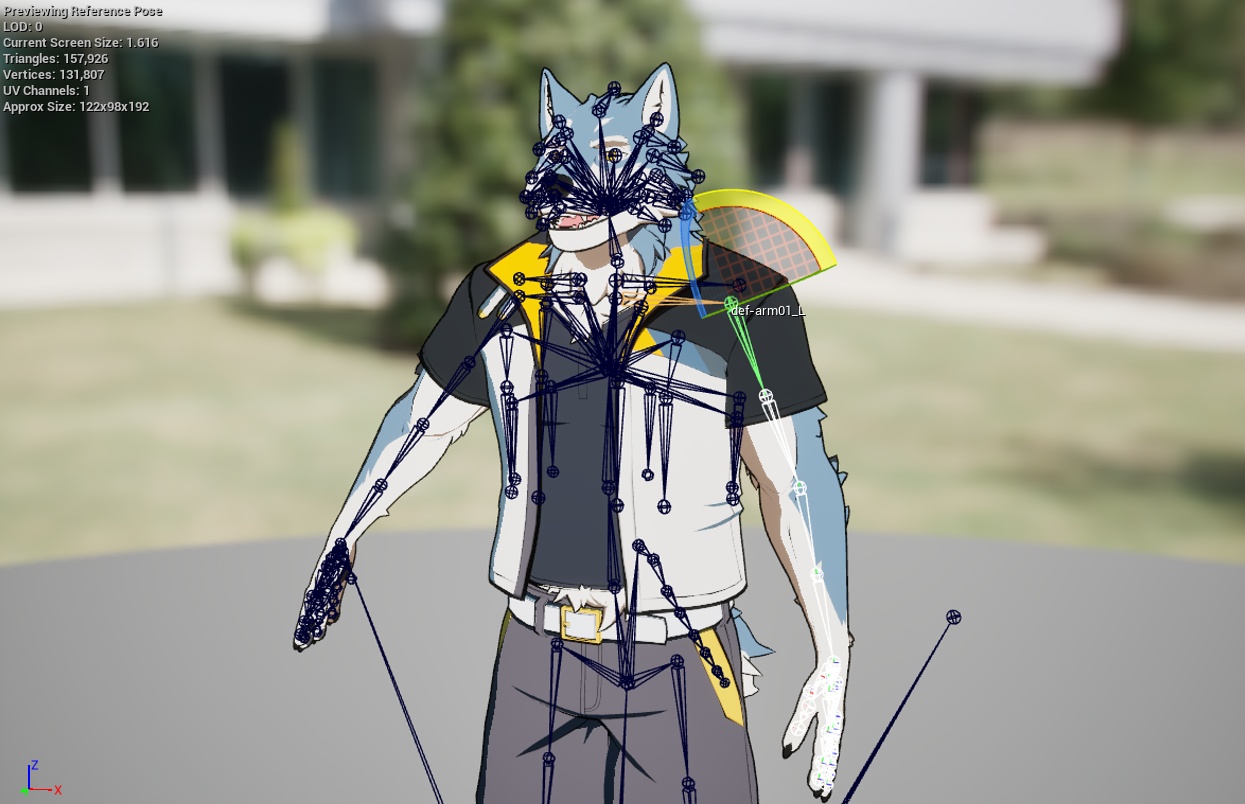
Now you can click on bones and use gizmos to translate, rotate, and scale them.
You can switch gizmos using buttons at the top of the viewport, or the following hotkeys:
- W (translate)
- E (rotate)
- R (scale)
Save as a Sequence
Once you’re happy with your pose, you need to save it as a new animation.
To do so, above the viewport click Create Asset > Create Animation > Current Pose
Do not use Create PoseAsset! In Unreal, a "pose asset" refers to a different kind of asset that is not used like an animation sequence.
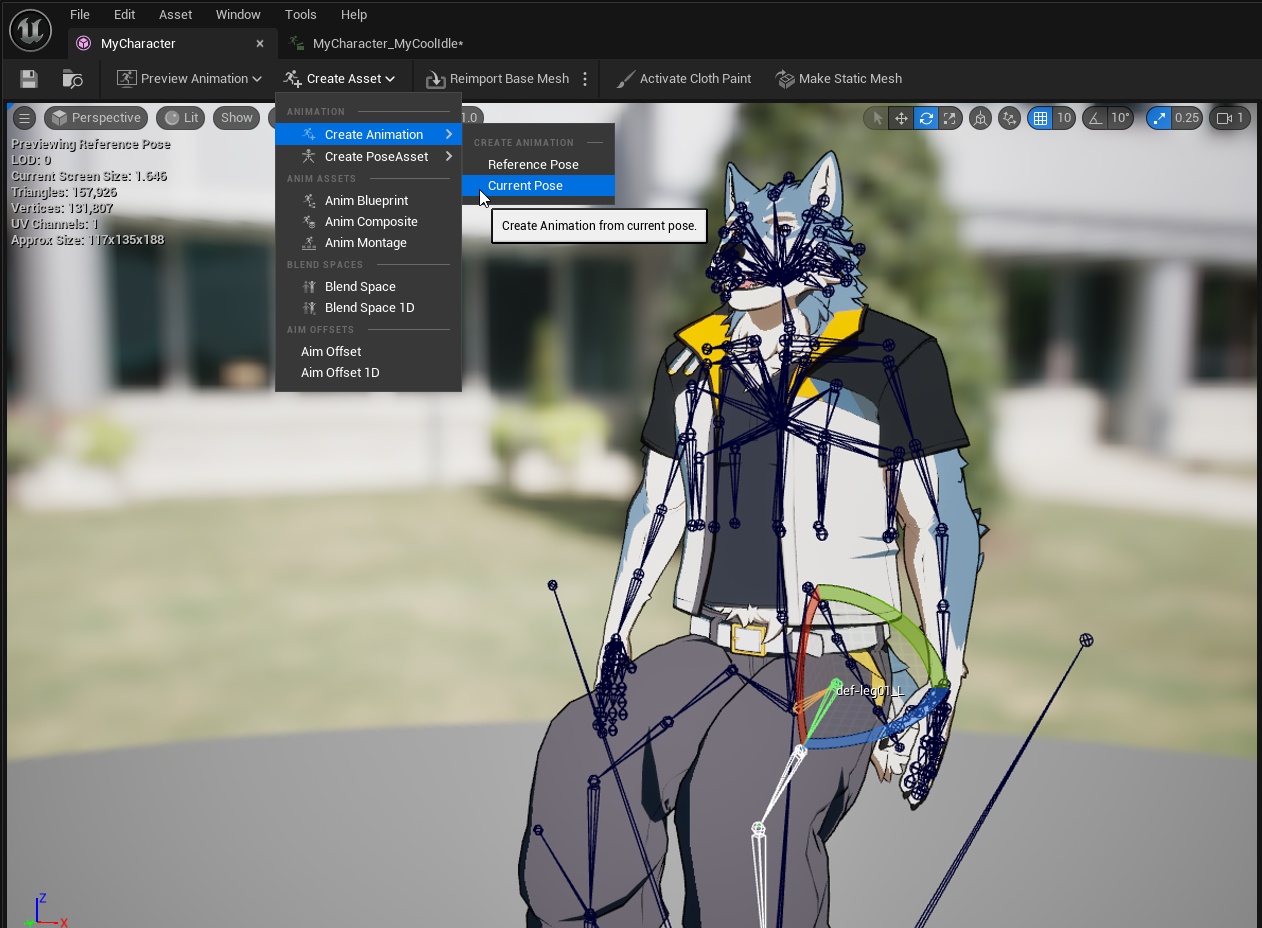
A dialog will appear asking you to choose a folder and name for your new animation.
Afterward, you will have a new animation sequence.

Using the Sequence
In Your Animation Blueprint
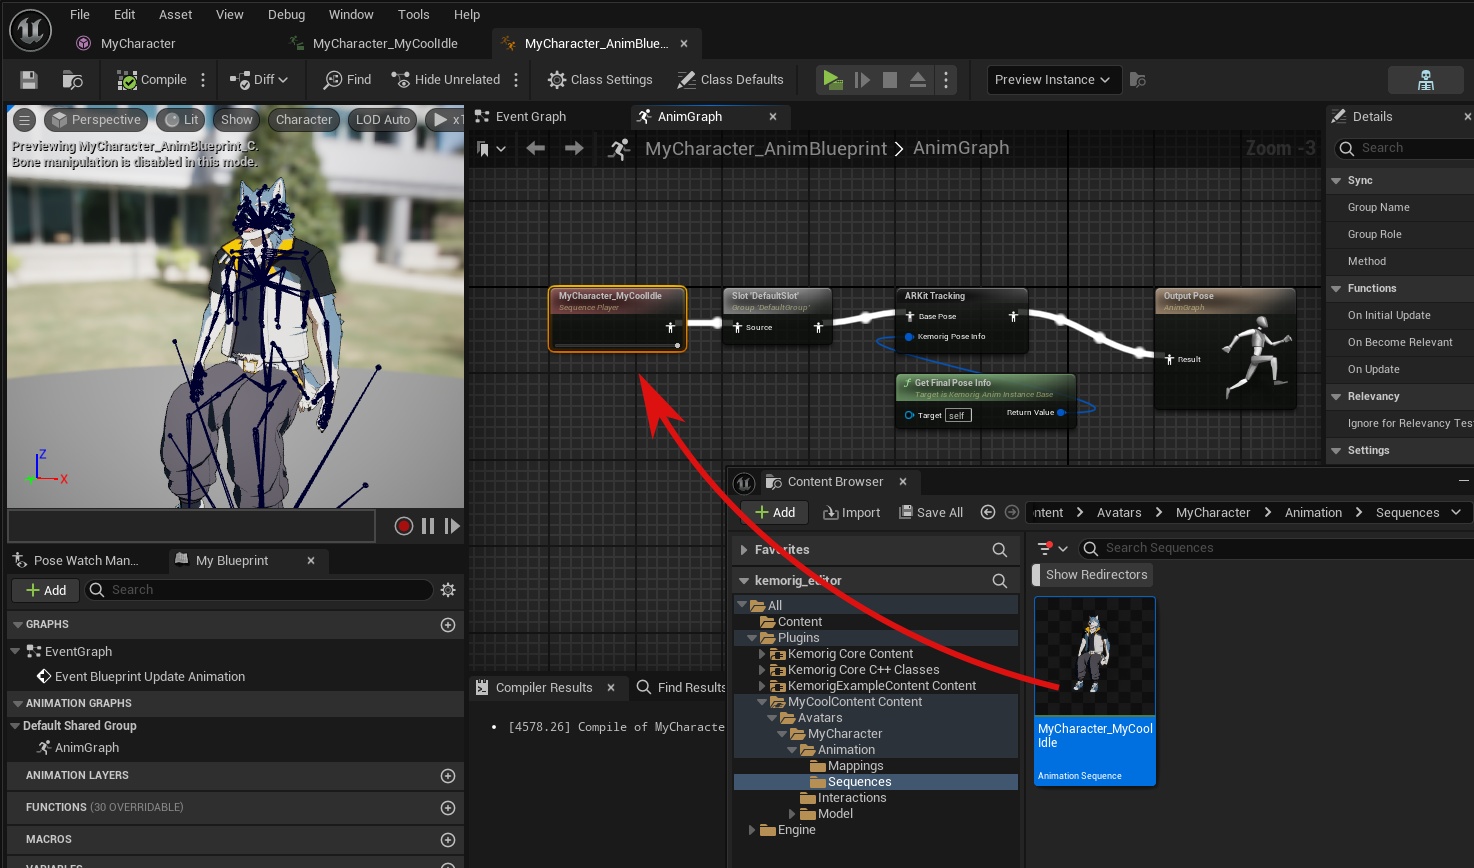
The simplest way to use your new animation sequence is to add it to the animation graph in your animation blueprint. This is not a robust solution, but it’s simple if you just need one pose.
Simply drag the asset into the animation graph and wire it in.
In a Stance
You can also use your new animation sequence in a Stance. For more information on setting up stances, see the following guide:

Stances
How to set up stances for your avatar
Rotate Bones in Your Animation Blueprint
This is an alternate method of posing where we manually rotate bones, without using an animation asset.
For example, maybe you just want to rotate the arms down out of a T or A pose into a natural rest position.
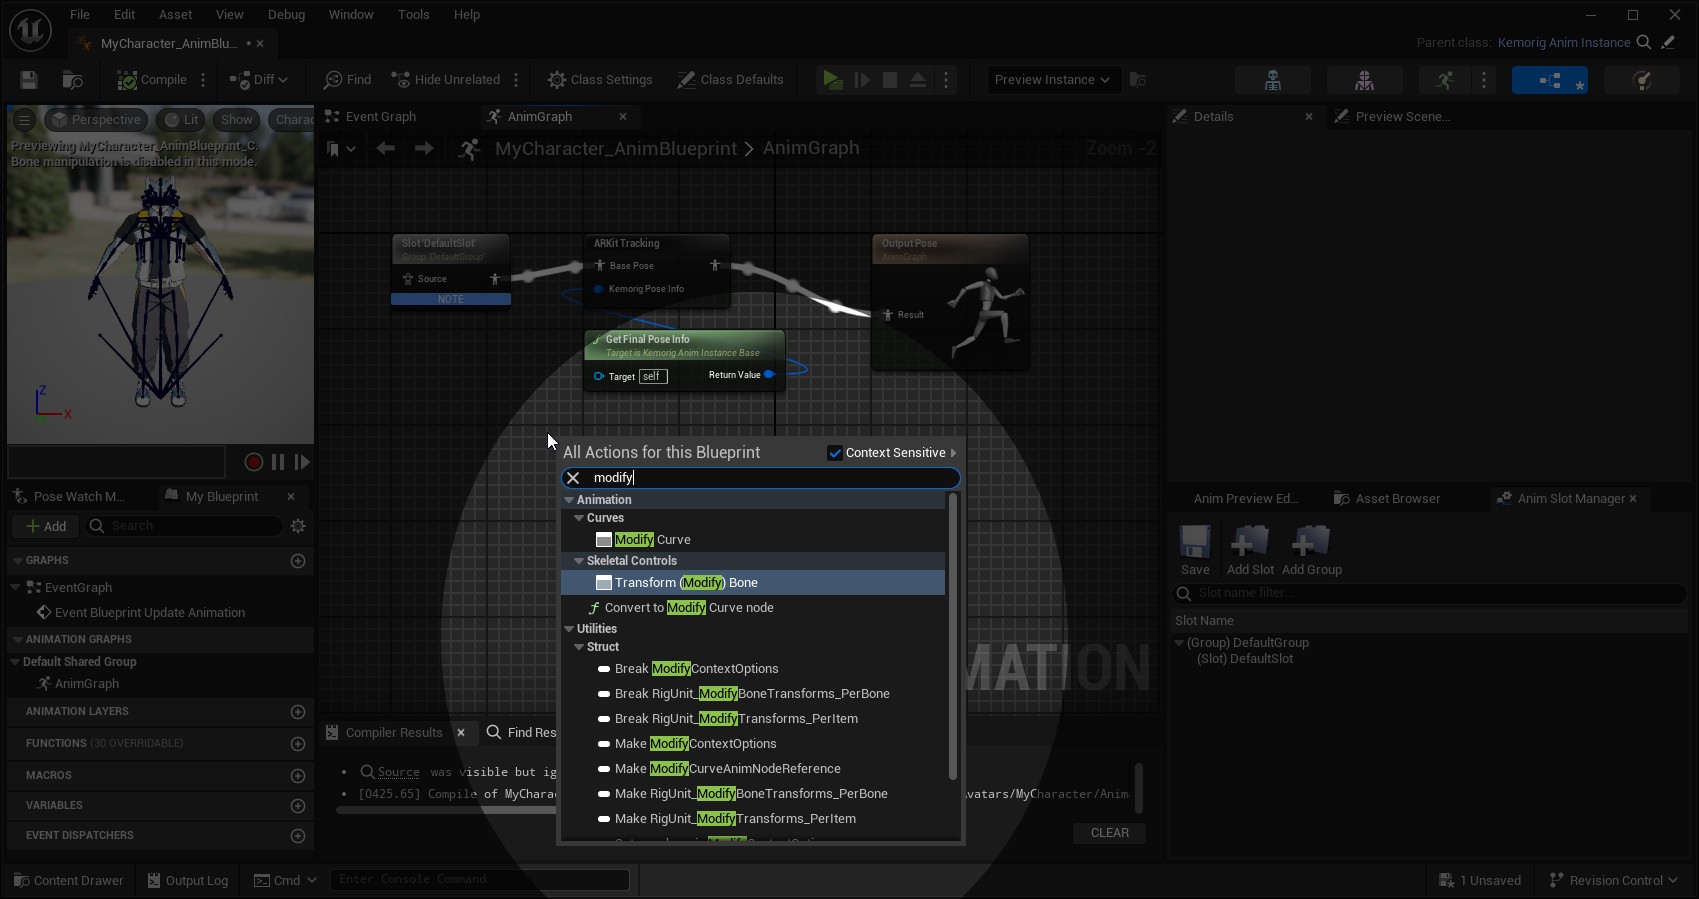
Add “Transform (Modify) Bone” Nodes
Open your avatar’s animation blueprint, and go to the AnimGraph.
Right click to add a new node, and find the “Transform (Modify) Bone” node (searching for “modify” is the best way to find it).
For this example, we’ll make two of these nodes (one for each arm) and wire them into the start of our graph.
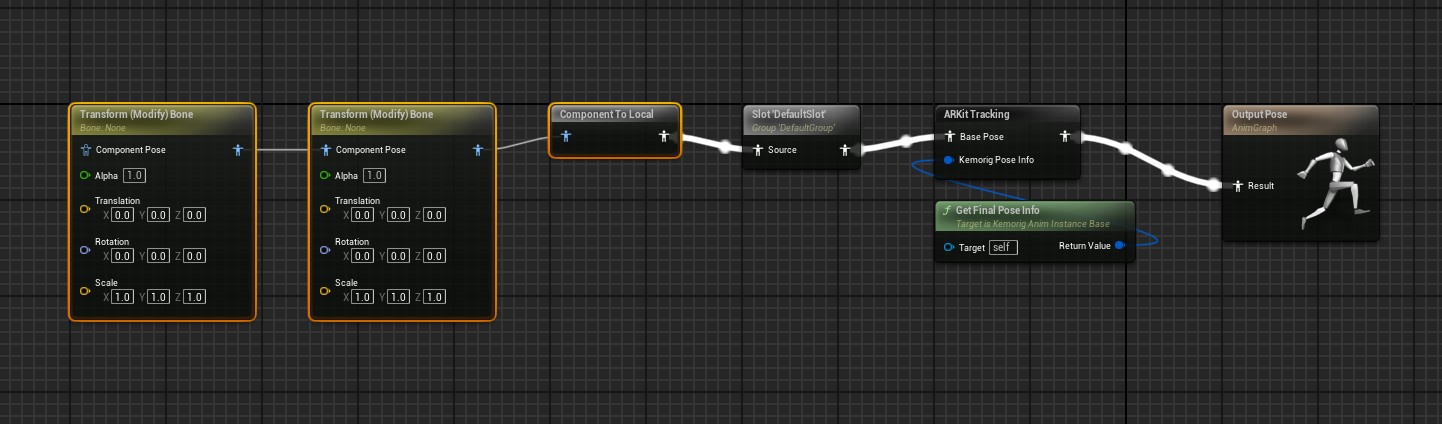
Notice the "Component To Local" node that we also need. This node will automatically be created when dragging the blue pin from the Transform node to the rest of our graph.
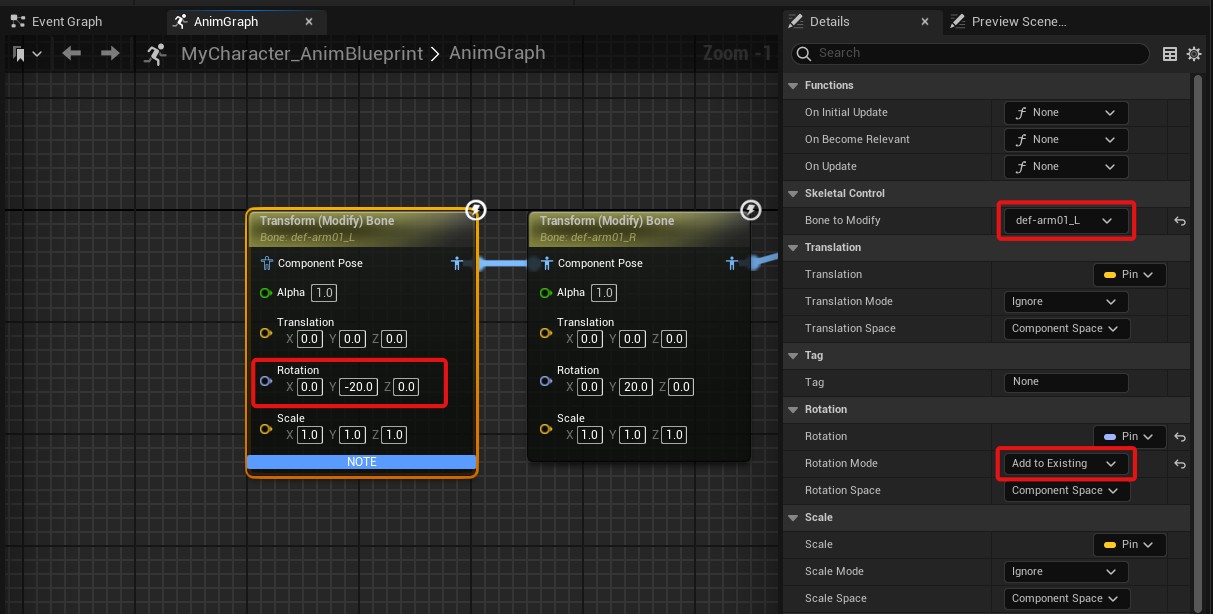
For each node, configure it as follows:
- Set Bone to Modify to the bone you want to manipulate.
- Set Rotation Mode to Add to Existing.
- On the node itself, adjust the rotation applied.
Once you compile the nodes at least once, you should see the model pose update in real time in the blueprint’s viewport.

You can also translate and scale bones with this node. Plus, you can manipulate the transform with a gizmo in the viewport.